Pages

Friday, September 30, 2005

Spinach Salad with Egg, Bacon and Goat Cheese


This recipe was inspired by a recipe from Cooking Light, May 2006.

4 cups fresh spinach leaves
4 eggs
4 slices of bacon, cooked (in microwave on paper towels)
1 ounce goat cheese, crumbled
Dijon Salad Dressing

Cook bacon on plate lined with paper towels (double layer on bottom, single layer on top) for about 5 mintues or until crisp. Remove bacon from plate and drain on a fresh paper towel.

Break 1 egg into each of 4 (6-ounce) custard cups coated with cooking spray. Cover with plastic wrap, and microwave at high for 40 seconds or until set; let stand 1 minute. Remove eggs from cups; drain on paper towels.

Assemble salads with 1 cup spinach, 1 egg, 1 slice of bacon crumbled, a sprinkling of goat cheese and a drizzle of Dijon dressing.

I talked about this recipe HERE.

What's for Dinner? (9/30/05)

DS finally went back to school today and I finally got out of the house. It became woefully apparent how long we'd been cooped up inside when I went to pay for my groceries and couldn't find my credit card. I hate it when I open my wallet and there's a blank spot where my credit card should be! Anyway, I had to think long and hard about where I might have used it last. The only place I could think of was the gas station - where I filled up Saturday - almost a week ago! Sure enough, they had it. Whew!

Since I finally made it to the store, I won't have to scrounge around for ingredients for dinners. My pantry and freezer are pretty well-stocked at all times, it's the vegetable and fruit supply that suffers when I don't get to the store.

Tonight's dinner plan:

Photo Courtesy of Cooking Light
A new recipe to try from Cooking Light
Crusty Bread
Salad
A new recipe to try from Everyday Food
Photo Courtesy of Martha Stewart
The rest of the weekend will be a mix of summer and fall. The weather is supposed to be gorgeous and in the 70s, so we'll do some grilling, but we'll also be taking advantage of apple season with even more apple recipes. I hope to try Joe's Caramel Apple Bars and try our hand at Candy Apples and Caramel Apples. Maybe even another brownie recipe......

Thursday, September 29, 2005

23/5 Meme

I am flattered to have been tagged by Joe over at Culinary in the Desert (who, by the way, has me drooling over Peanut Butter Cups and Caramel Apple Bars) for the 23/5 Meme which works like this:

1. Delve into your blog archive.

2. Find your 23rd post (or closest to).

3. Find the fifth sentence(or closest to).

4. Post the text of the sentence in your blog, along with these instructions. Ponder it for meaning, subtext, or hidden agendas….Tag others to do the same.

As it would happen my 23rd post happened to be today (I did not count the recipe-only posts without commentary)!

Here was my 23/5: One might think I'd have gotten a lot done with my 3 days off from work this week, but I feel like I did nothing.

You caught me. Guilty of massive procrastination. Or was it obsessive blogging? With a sick kid home from school for three days this week, I had hoped to accomplish more of those "things that need to done". However, I spent most of my time cooking (not a bad thing) and then blogging about it (questionable, but enjoyable). Or sprucing up my blog. Or watching the blog counters. What can I say? I'm a blog newbie, still entranced by all the little blog features that rank and track your site (in case you hadn't noticed all the blog directory links in my side bar). It will wear off and eventually I'll get back to that "to do" list. In the meantime, I hope the kids have enough clean underwear and socks.......

Since I'm so new, I'm not sure who has or has not been tagged, so I'll just take a shot and tag the following: Cookie Madness, Taste Everything Once, and Kayaksoup.

Fun idea!

Starting to go stir crazy...

...with our third day home this week. DS was inactive all day yesterday (not like him) but his fever stayed down - right until about bedtime when it went up over 100º again. I kept him home again today and took him to the doctor. Just as I figured, they didn't find anything, but at least I can send him to school tomorrow with more confidence. Thank goodness because I'm ready to go back to school too!
One might think I'd have gotten a lot done with my 3 days off from work this week, but I feel like I did nothing. I did do some cooking and lots of blogging, but didn't get all those other things done that are on my "to do" list like cleaning, phone calls, etc. Oh well. At least today I did manage to finish my online Excel course and will try to finish the Word course as well.

I'm tempted to try another brownie recipe, but may put that off until Saturday. What I really need to do is make sure I fit in some good exercise today to work off all the brownies I've eaten so far this week! Instead, I'll try something less fattening - maybe using up some of our apples from the orchard to make some Overnight Apple Butter.

I tried this recipe last year from Cooking Light and liked it very much. Not only is it easy and tasty, but it puts my crockpots to use - they don't get much of a workout, except for the very occasional recipe (like pot roast) and when I sometimes use them to make marinara. The recipe also includes stovetop instructions. Someone on the CL boards suggested using apple butter to flavor oatmeal - I tried it - very yummy!


Added note: I skip the straining part and simply use my immersion blender to get the mixture nice and smooth. Much easier and less messy!

Overnight Apple Butter
Source: Cooking Light, October 2004


Photo Courtesy of Cooking Light


A mixture of apple varieties, rather than just one type, will produce apple butter with rich, complex flavor in this slow cooker recipe. Good choices include Esopus Spitzenburg, Granny Smith, Jonathan, Northern Spy, Rome, Stayman, Winesap, and York. Enjoy the apple butter over toast or English muffins, or serve it with pork chops or chicken.

1 cup packed brown sugar
1/2 cup honey
1/4 cup apple cider
1 tablespoon ground cinnamon
1/4 teaspoon ground cloves
1/8 teaspoon ground mace
10 medium apples, peeled, cored, and cut into large chunks (about 2 ½ pounds)


Combine all ingredients in a 5-quart electric slow cooker. Cover and cook on low 10 hours or until apples are very tender. Place a large fine-mesh sieve over a bowl; spoon one-third of apple mixture into sieve. Press mixture through sieve using the back of a spoon or ladle. (See note above.) Discard pulp. Repeat procedure with remaining apple mixture. Return apple mixture to slow cooker. Cook, uncovered, on high 1 1/2 hours or until mixture is thick, stirring occasionally. Spoon into a bowl; cover and chill up to a week.

Stovetop variation: Combine all ingredients in a Dutch oven. Cover and cook over medium-low heat 1 hour or until apples are very tender, stirring occasionally. Strain through a sieve as recipe instructs in Step 2. Return mixture to pan. Cook, uncovered, over medium-low heat 15 minutes or until thick, stirring frequently.

Yield: 4 cups (serving size: 1/4 cup) NUTRITION PER SERVINGCALORIES 132(0.0% from fat); FAT 0.0g (sat 0.0g,mono 0.0g,poly 0.0g); PROTEIN 0.1g; CHOLESTEROL 0.0mg; CALCIUM 18mg; SODIUM 6mg; FIBER 3.1g; IRON 0.7mg; CARBOHYDRATE 35.3g

Domenica Marchetti
Cooking Light, OCTOBER 2004

Wednesday, September 28, 2005

What's cooking? (9/28/05)

Well I was wrong about DS being better....sent him to school yesterday, only to have him come home with a fever, so I kept him home today. So far so good - he slept in until 9 this morning, no fever so far, so I'm hoping we're done for real!

I got a couple of cooking projects done in between mowing the lawn. First, I made some granola. I decided that homemade granola is cheaper and healthier than store-bought, but I haven't made any in a while. This recipe was posted by beckms on the Cooking Light boards and it's delicious. I leave out the dried fruit - we add that to our cereal separately.

My next project was, you guessed it, yet another brownie recipe.
This was probably my least favorite so far. I did deviate a little bit from the recipe because I did not have enough regular cocoa and had to sub 1/4 cup plus 2 tablespoons of Hershey's Special Dark cocoa for the rest. This may have thrown off the flavor, but the flavor wasn't the problem, it was the texture. These were not moist enough and did not have any of that chewy texture I was hoping for.
I’ll post the recipe anyway, for anyone who might want to try it. And darn it, I cannot get a good brownie picture to save my life. They all come out blurry! I'll keep trying, but in the meantime, please excuse my very amateurish attempts....
Source: BitterSweet, November 2003
And last, but not least, on the menu for dinner tonight:
An easy, comfort-food kind of meal, great for weeknights.
Salad
Whatever is in the vegetable bin....
That's it for cooking today!

Tuesday, September 27, 2005

My 15 minutes

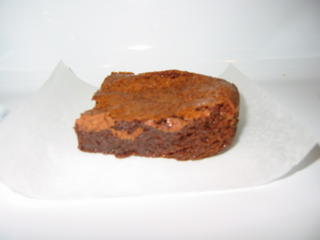
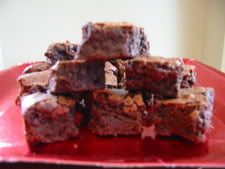
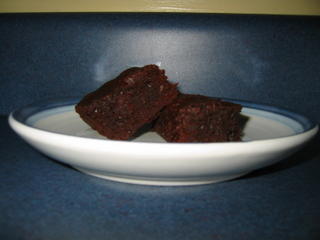
No day off today (DS is better) so probably no brownies either. Besides, I think I need a break. My stomach was a little overwhelmed yesterday from 2 days of brownie tasting. But I won't wait long - it's much easier to compare recipes if you don't let too much time pass inbetween...

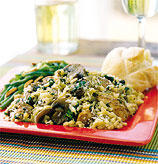
Not sure what will be going on in the kitchen today, but since I'd like to post at least once a day, I thought this might be a good time to post my marinara recipe.

But first my apologies to anyone from the CL boards who is reading this! They have heard about this sauce ad nauseum - so much so that it's a bit of a joke any time someone asks where to find this recipe!

Several years ago I was hunting for the perfect marinara sauce to make at home. I like a thick, slightly sweet, deeply red, sauce. My experimenting began in earnest after this thread from, where else, the Cooking Light Bulletin Board (if you need to know anything, this place is a GREAT resource!!!): What dish are you trying to perfect? . When I mentioned my pursuit of the perfect marinara, I got many suggestions.

Once I picked the suggestions that sounded interesting to me, I got to work and pretty quickly came up with a sauce that I really, really liked. I posted my results to this thread: Marinara .

My memory is a little fuzzy, but I think I submitted the recipe to Cooking Light shortly after developing the recipe, but never heard anything and that was that. For a while. Then came this thread: Lindrusso's Magnificent Marinara and my recipe started to receive a lot of attention. So much attention that I finally decided to send it in to Cooking Light again, directing them to the thread so they could see the response for themselves.

The second try was success and after a few phone calls, emails and a photo session, my recipe was published in the August 2004 issue of Cooking Light. I kept it a secret from my friends and family until the issue came out. It was a lot of fun and my Dad complained that I got more attention from my one recipe than he did for his many published works in the paleoclimatology field!

Of all the suggestions that I used, I think the tip for caramelizing the onions was the key. One thing I had not liked about my past attempts was that the onion seemed to leave a harsh, unpleasant flavor behind, not the mellow flavor I was seeking. Caramelizing the onions gives it a more mellow flavor that I adore. Same with the garlic. By crushing, rather than mincing, the garlic is less harsh and imparts a much more subtle flavor.

This is a simple sauce. I created it that way on purpose so that I could use this sauce as a base for many different things. Add a little more crushed red pepper and a bit more garlic and you have nice base for a red clam sauce. Or add more fresh or dried herbs for a stronger, more savory sauce. Add a capers and black olives and you have Puttenesca.

Some folks find this sauce too sweet and some folks even go so far as to say that sugar does not belong in marinara sauce. If you don't like a sweet sauce, you may want to leave out the sugar. The main reason for the sugar is to help the onions caramelize,but it also helps neutralize canned tomatoes which can be quite acidic.

An embarassing side note: Just this past year, I realized that I had forgotten to include 2 bay leaves with my recipe. I always use 2 bay leaves! I have no idea how I forgot to include them.

The published recipe also says to cook the sauce for 3 hours - I actually cook it for closer to 6 hours. I think they edited that part of the recipe so as not to turn off too many busy people. The minimum I think you can get away with is 2 hours - the flavors really begin to mellow and come together at this point. You can also cook this recipe in a crockpot if you don't have time to watch a simmering pot on the stove - your sauce may turn out a little more watery since it won't cook down quite as much, but it still works quite well.

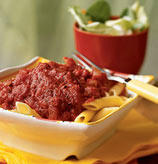
Here is the recipe (for those who don't frequent the Cooking Light boards and haven't seen it a million times...wink, wink....):

Marinara Magnifica


Dry red wine intensifies the well-blended flavors in this lusciously seasoned tomato sauce--magnifico! Serve over your favorite pasta.

1 tablespoon olive oil
6 cups chopped onion (about 3 medium)
1 tablespoon sugar
1/2 cup dry red wine
1 tablespoon extravirgin olive oil
2 teaspoons dried oregano1 teaspoon salt
1/2 teaspoon dried thyme
1/2 teaspoon dried marjoram
1/2 teaspoon dried basil
1/2 teaspoon freshly ground black pepper
1/4 teaspoon crushed red pepper
(2 bay leaves)
6 garlic cloves, crushed
2 (28-ounce) cans crushed tomatoes, undrained
2 (14.5-ounce) cans diced tomatoes, undrained
2 (6-ounce) cans tomato paste

Heat oil in a Dutch oven over medium heat; add onion and sugar. Cook 30 minutes or until golden, stirring occasionally. Stir in wine; cook 1 minute. Add remaining ingredients; bring to a boil. Reduce heat, and simmer 3 hours, stirring occasionally.

Yield: 9 cups (serving size: 1 cup)

NUTRITION PER SERVINGCALORIES 169(20% from fat); FAT 3.8g (sat 0.5g,mono 2.3g,poly 0.6g); PROTEIN 5.3g; CHOLESTEROL 0.0mg; CALCIUM 131mg; SODIUM 960mg; FIBER 6.5g; IRON 2.9mg; CARBOHYDRATE 30.9g

Cooking Light, AUGUST 2004

Here are the links to the article and the recipe on Cooking Light but I don't know if the link will work for non-subscribers.

Monday, September 26, 2005

A day off from work...

...means more time to try brownie recipes!

DS#2 is home from school with a fever, so I am home too. Decided to try yet another brownie recipe, but I guess I should also figure out what's for dinner.

First things first:


Classic Brownies
Source: Cook's Illustrated

Be sure to test for doneness before removing the brownies from the oven. If underbaked (the toothpick has batter clinging to it), the texture of the brownies will be dense and gummy; if overbaked (the toothpick comes out completely clean), the brownies will be dry and cakey.

Makes twenty-four 2-inch-square brownies

1 cup pecans or walnuts (4 ounces), chopped medium (optional)
1 1/4 cups plain cake flour (5 ounces)
1/2 teaspoon table salt
3/4 teaspoon baking powder
6 ounces unsweetened chocolate , chopped fine
12 tablespoons unsalted butter (1 1/2 sticks), cut into six 1-inch pieces
2 1/4 cups sugar (15 3/4 ounces)
4 large eggs
1 tablespoon vanilla extract

1. Adjust oven rack to middle position; heat oven to 325 degrees. Cut 18-inch length foil and fold lengthwise to 8-inch width. Fit foil into length of 13- by 9-inch baking dish, pushing it into corners and up sides of pan; allow excess to overhang pan edges. Cut 14-inch length foil and, if using extra-wide foil, fold lengthwise to 12-inch width; fit into width of baking pan in same manner, perpendicular to first sheet. Spray foil-lined pan with nonstick cooking spray.

2. If using nuts, spread nuts evenly on rimmed baking sheet and toast in oven until fragrant, 5 to 8 minutes. Set aside to cool.

3. Whisk to combine flour, salt, and baking powder in medium bowl; set aside.

4. Melt chocolate and butter in large heatproof bowl set over saucepan of almost--simmering water, stirring occasionally, until smooth. (Alternatively, in microwave, heat butter and chocolate in large microwave-safe bowl on high for 45 seconds, then stir and heat for 30 seconds more. Stir again, and, if necessary, repeat in 15-second increments; do not let chocolate burn.) When chocolate mixture is completely smooth, remove bowl from saucepan and gradually whisk in sugar. Add eggs one at time, whisking after each addition until thoroughly combined. Whisk in vanilla. Add flour mixture in three additions, folding with rubber spatula until batter is completely smooth and homogeneous.

5. Transfer batter to prepared pan; using spatula, spread batter into corners of pan and smooth surface. Sprinkle toasted nuts (if using) evenly over batter and bake until toothpick or wooden skewer inserted into center of brownies comes out with few moist crumbs attached, 30 to 35 minutes. Cool on wire rack to room temperature, about 2 hours, then remove brownies from pan by lifting foil overhang. Cut brownies into 2-inch squares and serve. (Store leftovers in airtight container at room temperature up to 3 days.)

My notes: These brownies were closer to the texture I'm looking for - chewy on the edges - but these too seemed underdone in the middle. I baked them for 35 minutes and the toothpick came out fairly clean with only a few crumbs, indicating they were done. When I cut into them, they are still a bit gooey in the middle. The chocolate flavor in these is not quite as good as the chocolate flavor in the Fudgy, Chewy, Cakey brownies.

Another thing that doesn't thrill me with this recipe is that it uses cake flour and unsweetened chocolate - two things that I don't use as often as all-purpose flour or semisweet chocolate.

I'm not sure where to go from here. Part of me likes to tweak, another part of me just wants to keep trying recipes until I find one that works all by itself with no tweaking.....hmmm.....I may end up running through my collection of "to try" recipes and THEN picking one to tweak.

I am beginning to think that the chewiness I seek comes from a brownie made only with cocoa. However, I am afraid that a cocoa-only brownie not have enough rich, chocolate flavor. Perhaps a cocoa-only brownie should be next on the list....

Stay tuned......DS#2 still has a fever, so there's always tomorrow..........

Sunday, September 25, 2005

So many Brownies....

...so little time.....

Here's one posted by cinnamon_queen (Erika) on the Cooking Light boards....the description sounds just what I'm looking for. Worth a shot! Here's a link to that thread so that you can read the reviews: My Perfect Brownies! I found it!


Here are Erika's notes: "I finally found a brownie recipe that I love...that I think are perfect...the kind of recipe where I am now able to stop searching for more! They had great height, just the right texture, and a perfect top. Not too fudgey so that they were gooey, not so cakey that you felt the need to eat it with a fork and have icing on them, and just enough chewiness to keep the brownies together. This is from Pam Anderson's book "The Perfect Recipe" (and it is!) For those of you that don't know who she is, she is with Cook's Illustrated. She was also in a recent article in CL. The book is set up in a similiar format as a CI articles in testing numerous recipes and saying what didn't work, what combination was best etc. Also, like with all of the CI recipes, it's important to follow the steps and the recipe as is to get the same results. The brownie recipe is the first one that I have made from this book, but I know there will be many more."

Image hosted by Photobucket.com

Fudgy, Chewy, Cakey Brownies
Source: Pam Anderson's The Perfect Recipe

2/3 cup all-purpose flour
1/2 teaspoon salt
1/2 teaspoon baking powder
Vegetable cooking spray
2 ounces unsweetened chocolate
4 ounces bittersweet or semisweet chocolate
10 tablespoons (1 stick plus 2 tablespoons) unsalted butter
1 1/4 cups sugar
2 teaspoons vanilla extract
3 large eggs
3/4 cup toasted walnuts, pecans, macadamia nuts or peanuts (optional)

1. Adjust oven rack to lower-middle position and preheat oven to 325 degrees.

2. Whisk flour, salt and baking powder in a small bowl; set aside. Spray an 8-inch baking pan with vegetable cooking spray. Fit a 16- by 8-inch sheet of foil in pan and up 2 sides, so you can use foil overhang as a handle to pull cooked brownies from pan. Spray sheet of foil with vegetable cooking spray.

3. Melt chocolates and butter in a medium bowl over a pan of simmering water. Remove from heat; whisk in sugar and vanilla. Whisk in eggs, one at a time, fully incorporating each one before adding the next. Continue to whisk until mixture is completely smooth and glossy. Add dry ingredients; whisk until just incorporated. Stir in nuts, if desired.

4. Pour batter into prepared pan; bake until a toothpick or cake tester inserted into center comes out with wet crumbs, 35 to 45 minutes.

5. Cool brownies in pan on a wire rack for 5 minutes. Use foil handles to pull brownies from pan. Completely cool brownies on rack, at least 3 hours. Cut into squares and serve. If not serving immediately, do not cut brownies. (Whole brownie cake can be wrapped in plastic wrap, then foil, and refrigerated for up to 5 days.)

My notes: I'm bumping this back to the top now that I've finally tried them.

These brownies had a great chocolate flavor but they were too gooey. Since Erika did not find them gooey, I'm wondering if I should have baked them a little longer. I will keep these on the list to try again, baking them for longer than 40 minutes. It's hard to tell when something is underdone or when it's just very buttery/chocolatey. And of course, I don't want to end up with a dry brownie!

Before I try this one again, I want to go back to a Cook's Illustrated recipe that I tried earlier in the year. I tweaked it a little and thought it was really close, but not quite there. More on that later.....

I'm going to have to start bringing my experiments to work......or my waistline will be paying too high a price!

Culinary Aspirations - My Project List

Mostly as a reminder to myself, I am posting a list of my culinary aspirations.

(You know, I almost named my blog "Culinary Aspirations", but I thought it might end up sounding like something someone got stuck in their lungs!)

In any case here is my list:

Deep Dish Pizza - I would love to learn how to make good, deep dish pizza. My first challenge will be to find an appropriate pan, though I've read you can do them in a cast iron skillet.

Sushi - I think it would be a lot of fun to learn to make sushi. Not only does my whole family love sushi (mostly the kind without raw fish, but they will do raw tuna), but it would be a great thing to serve at or bring to a party. I've got some of the supplies, now I need to hunt down a few recipes. I wonder how hard it will be to perfect rolling it???

Naan - I have tried one recipe for naan and while it came out pretty well, it was not close enough. Although it will likely be near impossible to make it just like the restaurants - after all, I don't have a tandoori oven - I would like to see how close I can come.

The Perfect Brownie - Here at least is a project that I have actually made a bit of progress on. I have tried many very good recipes, but I have a very specific flavor and texture in my head and I have not yet found the perfect recipe for me. My perfect brownie is chewy (especially on the edges) and moist with a deep, rich chocolate falvor. Needless to say, my family LOVES this project. I almost don't want to find it.....then I wouldn't have a good excuse to keep making brownies!

Canning - I have never canned anything in my life as I find that freezing most things works quite well for me - we have a large upright freezer in the garage and limited cabinet space. Still, I'd like to learn how to can for things like gifts - I would like to make my marinara sauce to give away - kind of hard to do if it's frozen.

I'll add more as I think of them.....


What's for dinner? (9/25/05)


Photo Courtesy of Cooking Light

Let's grill while we still can!
A delicious recipe from the Vegetarian Epicure

Saturday, September 24, 2005

What's for dinner? (9/24/05)

A recipe from Martha Stewart's Everyday Food


Just a simple recipe that's quick and easy.
After much fanfare and competition, sometimes simple is best.

The Dog Blog! WDB #2.

My plan is to keep this site mainly about food, but I can't resist joining in Sweetnick's Weekend Dog Blog.

This is our dog Bailey, a very light Golden Retriever. We got him in April 2004 at 4 months old. I researched breeders online and drove 2 1/2 hours to Detroit to look at a litter. We fell in love with him right away! Although we really wanted to get a younger pup, we knew that personality was really most important. Bailey has turned out to be a sweet, mellow dog with lots of personality and very good with the kids.

This is a picture from this summer that cracks me up. It's so hard to get a photo of your dog doing something funny because as soon as you get up to get your camera, of course they follow you to see what's going on! There are so many pictures that I've tried, and failed, to get, but I did get this one.

We don't give Bailey many table scraps, but we wanted to see what he'd do with a string bean.......


P.S....Is anyone having a hard time with the photo upload tool? I have to try several times to get the photo to load - it gets stuck a lot or goes to a blank screen with no "done" button. Twice today it automatically loaded a picture I had already used somewhere else. Argh!

Friday, September 23, 2005

Apple Recipes

Our first apple recipe did not come out quite as planned.

First there was the confusion between "baked apples" and "fried apples". DS#2 requested baked apples for his apples. When he saw what I had assembled, he said it wasn't what he was expecting. Upon further questioning, we discovered that what he really wanted was fried apples. No matter, they are similar enough and I told him that he would like the baked version.

I got my basic idea from this recipe on Epicurious: Maple Pecan Baked Apples. I took the basic recipe and simplified it. After I prepared the apples, I put little bit of butter in the bottom of each one. I chopped up some raisins, pecans and added some coconut, placing this mixture into the middle of each apple. I then drizzled a bit of maple syrup on top, letting it soak down into the raisin-nut mixture. I topped each apple with another small piece of butter. Lastly, I sprinkled each apple with sugar, nutmeg and cinnamon.

I baked the apples at 350º for one hour. This is where the mistake came it - I baked them uncovered. The apples were good, but they were dried out and not tender enough. We still enjoyed them, but they definitely would have been MUCH better had I cooked them correctly! Better luck next time....but still a very tasty recipe.


Maple Pecan Baked Apples
Source: Epicurious.com

Try these for both dessert and breakfast. They're great with their pan juices or the Apple Custard Sauce.

6 large Golden Delicious apples (about 3 1/2 pounds)
2/3 cup plus 6 tablespoons coarsely chopped pecans
1/3 cup golden raisins
1/4 cup sweetened flaked coconut
2 tablespoons pure maple syrup
1 teaspoon grated lemon peel
1/4 teaspoon ground cinnamon
1/4 teaspoon ground nutmeg
6 tablespoons peach or apricot preserves
1 cup unfiltered apple juice or cider
2 tablespoons (1/4 stick) unsalted butter

Preheat oven to 375°F.

Core apples. Peel top third of each apple. Using small sharp knife, cut 1/4-inch-deep line all around each where peel and flesh meet. Using small sharp knife, cut about 1 1/4-inch-wide, 1-inch-deep hollow in top of each apple. Cut off thin slice from bottom of each to allow apples to stand flat. Place apples in 13x9x2-inch glass baking dish.

Finely chop 2/3 cup pecans, raisins and coconut in processor. Transfer to small bowl. Mix in maple syrup, lemon peel, cinnamon and nutmeg. Divide filling equally among hollows in apples.

Spread 1 tablespoon preserves over top of each apple and into hollows. Press 1 tablespoon chopped pecans atop each.

Combine apple juice and butter in small saucepan. Stir over medium heat until butter melts. Pour into dish around apples. Cover dish loosely with foil. Bake apples 30 minutes. Remove foil; bake until apples are tender, basting with juices every 10 minutes, about 35 minutes longer. Serve apples warm with pan juices.

Serves 6.

Apples!

To satisfy the sharp desire I had Of tasting those fair apples, I resolv'd Not to defer; hunger and thirst at once Powerful persuaders, quicken'd at the scent Of that alluring fruit, urged me so keen. ~John Milton, Paradise Lost

L to R: Gingergold, Paula Red and last two are Honey Crisp

We made our first visit to the local apple orchard today after school. The boys each got to pick out a dessert they wanted to make and a new apple to try that would be good for each dessert. The orchard had a very, very helpful list about which kids of apples were good for eating, pies, baking, etc. The boys ended up picking Gingergold and Paula Red. I picked out a bag of Honey Crisps, one of my favorites.

The small Honey Crisp came from the orchard, the larger one came from Mejier (our local supermarket). I wanted to compare them to see which one was tastier. Surprisingly enough, the one from the supermarket was quite a bit tastier!

My oldest son (11) decided that he wanted to make an apple pie with his apples. My youngest wants baked apples. So, I'm off to find a recipe for baked apples for tonight! I will report back here with the recipes later.

You know what they say about the best laid plans!

Double sigh.

Our anniversary was spent at the roller rink with my boys, followed by driving through KFC for dinner. Not that the dinner I had planned was necessarily for our anniversary (but I did buy some champagne), but at least it would have been a pretty nice dinner!

Silly me, I forgot that I had agreed to take the boys to a free skating party sponsored by our school's PTO. When I told them we would go, I was thinking in terms of it being on a "Thursday", not in terms of it being "September 22", our anniversary. I couldn't back out from taking the boys and it also ate up my cooking time.

Tonight I'm supposed to go out partying with the girls, but I think I may have to back out because I'll feel guilty. I went out with the girls - a different group - on Wednesday night and then last night was a bust. I don't think I can go for 3 nights in a row, so yesterday's menu may actually be realized tonight.

Thursday, September 22, 2005

What's for Dinner? (9/22/05)

It happens to be our 15th wedding anniversary tonight, but sadly, we don't have special plans. I've planned a decent dinner, but not an anniversary dinner. We're still trying to decide if we want to cook a special meal for ourselves this weekend or go out somewhere. Sigh.....not every romantic, huh?

In any case, on tonight's menu is:
~Broiled Tilapia with Thai Coconut-Curry Sauce
~brown basmati rice
~Sesame Roasted Asparagus

Broiled Tilapia with Thai Coconut-Curry Sauce
Source: Cooking Light, September 2002

Tilapia's mild flavor allows the bold flavors in this brothy sauce to shine. Serve this dish with rice, which will absorb the sauce.

1 teaspoon dark sesame oil, divided
2 teaspoons minced peeled fresh ginger
2 garlic cloves, minced1 cup finely chopped red bell pepper
1 cup chopped green onions
1 teaspoon curry powder
2 teaspoons red curry paste
1/2 teaspoon ground cumin
4 teaspoons low-sodium soy sauce
1 tablespoon brown sugar
1/2 teaspoon salt, divided
1 (14-ounce) can light coconut milk
2 tablespoons chopped fresh cilantro4 (6-ounce) tilapia fillets
Cooking spray
3 cups hot cooked basmati rice
4 lime wedges

Preheat broiler.

Heat 1/2 teaspoon oil in a large nonstick skillet over medium heat. Add ginger and garlic; cook 1 minute. Add pepper and onions; cook 1 minute. Stir in curry powder, curry paste, and cumin; cook 1 minute. Add soy sauce, sugar, 1/4 teaspoon salt, and coconut milk; bring to a simmer (do not boil). Remove from heat; stir in cilantro.

Brush fish with 1/2 teaspoon oil; sprinkle with 1/4 teaspoon salt. Place fish on a baking sheet coated with cooking spray. Broil 7 minutes or until fish flakes easily when tested with a fork. Serve fish with sauce, rice, and lime wedges.

Yield: 4 servings (serving size: 1 fillet, 1/2 cup sauce, 3/4 cup rice, and 1 lime wedge)

CALORIES 506(30% from fat); FAT 17.1g (sat 5.9g,mono 6g,poly 2.5g); PROTEIN 29g; CHOLESTEROL 82mg; CALCIUM 47mg; SODIUM 616mg; FIBER 3.1g; IRON 2.7mg; CARBOHYDRATE 56.6g

Sesame Roasted Asparagus
Source: Cooking Light, May 2001

36 spears asparagus
1 1/2 teaspoons dark sesame oil
1 teaspoon low-sodium soy sauce
1/8 teaspoon black pepper

Preheat oven to 450º.

Snap off tough ends of the asparagus spears. Combine asparagus and the remaining ingredients in a jelly-roll pan, turning asparagus to coat.

Bake at 450º for 10 minutes or until the asparagus is crisp-tender; turn once. Yield 4 servings (serving size: 9 asparagus spears).

Calories 43 (44% from fat); Fat 2.1g (sat 0.3g, mono 0.7g, poly 0.9g); Protein 3g; Carb 4.9g; Fiber 1.2g; Chol 0mg; Iron 0.9mg; Sodium 53mg; Calc 23mg.
Source: "Cooking Light, May 2001, page 174."


Infected computer - TweakXP is awesome!

Straying from the topic of food and cooking for a moment to say thanks and ARGH!

I just spent the last day or so trying to get rid of some sort of spyware/virus/trojan. As I was trying to blog on Tuesday night, I started having problems when I tried to switch between open internet windows - which, as anyone who blogs knows, you need to do quite a bit to check your updated blog.

We tried running all of our software (Norton, SpySweeper, Spybot, and Ad-Aware) - did find one problem but it was supposedly removed. Not so fast.

Anyway, we ended up at the TweakXP forums where a kind soul analyzed my HijackThis log and showed me what to run and what to delete. So far, all seems to be well.

I have to say that I do like the humor of some of these guys. There's a program called "CrapCleaner"and a site called "PC Hell" (hey, I think I've been there a few times!).

If you should ever need them, and I hope you don't........


Thanks Tweak guys! Now I am free to blog once again...

Tuesday, September 20, 2005

What's for dinner? (9/20/05)

Folks on the Cooking Light (CL from here on out) have been raving over this simple dish, so I'm giving it a try tonight, only with a mexican twist that was recommended by Bob and Sandy. Looks easy and nutritious and I happen to have all the necessary ingredients on hand.

Easy Layered Beans and Rice
Source: The Meatless Gourmet: Easy Lowfat Favorites (posted by Kari)

1 cup long-grain white rice, uncooked
4 sun-dried tomato halves (not packed in oil), cut into small pieces
1 (8-oz) can corn, drained
1 1/4 cups boiling vegetable broth
2 cups reduced-fat, meatless spaghetti sauce
1 (1-lb) can pinto beans, rinsed and drained (or 2 cups of cooked beans)
1 cup shredded reduced-fat mozzarella cheese (4 oz)
1 tablespoon grated Parmesan cheesePreheat oven to 375F.

Lightly oil a deep 2-quart casserole or spray with a nonstick cooking spray.Spread rice in the casserole. Sprinkle with sun-dried tomatoes. Spread corn evenly over rice. Gently pour broth over corn.Spoon half of the spaghetti sauce evenly over the corn. Spoon beans over the sauce, followed by remaining sauce. Cover tightly and bake 45 minutes. Uncover, sprinkle with both cheeses, and return to oven until cheese is melted and begins to brown, 5-10 minutes.

Serve-again hint: Here's everything you need for a bean and rice burrito, including the cheese. Just roll leftovers in flour tortillas, heat in an oven or microwave, then top with salsa.Makes 4 servings.Per serving: 413 cals, 6g fat (3 g sat), 19g pro, 71g carbs, 938mg sod, 11mg chol

Here is the ingredient list that I actually ended up using:

1 cup brown rice
1 1/4 cups chicken stock
2 cups salsa
1 cup diced tomatoes, with their juices
1 can pinto beans
1/2 cup grated cheddar cheese
1/2 cup mozzarella cheese

Verdict: It was very easy to put together - no chopping and it was all cooked in one dish. It didn't knock us off our seats, but it was quite tasty and everyone enjoyed it.

I look forward to trying some variations on this theme. Bob at CL mentioned trying an Indian version of this - that sounds like a winner!

The great thing about this recipe is it's very adaptable - a dinner for those nights when you just don't know what to make.

Monday, September 19, 2005

Oh baby that's good....Gorgonzola Polenta in the Rice Cooker

I'm not sure how easy this will be to follow, but it was sooooo good, I had to try to share it. I can't wait to try a lower-fat version to see it will be as good.

This recipe is for a firmer polenta that you then allow to set-up and slice. I wanted a creamy polenta, so I played around with it a bit by adding more liquid at the end of the cooking time. This seemed to work fine, though in the cookbook, the creamier polentas call for more liquid at the beginning, not at the end. I made it pretty much full fat, but in the future I plan to try to cut back the fat.

Here's the recipe as originally written with my adaptations in parentheses:

Gorgonzola Polenta
Source: The Ultimate Rice Cooker Cookbook

Machine: Medium (6-cup) rice cooker; fuzzy logic (preferred) or on/off.
Cycle: Quick Cook and/or regular or Porridge
Yield: 6 servings.

1/4 cup (1/2 stick) unsalted butter (I think this could be cut back)
1 small white onion, finely chopped
1 cup chicken stock (I ended up adding about 3/4 cup more at the end to get the right consistency)
1 cup milk (I'll try skim next time)
3/4 cup coarse-grain yellow polenta (I used Bob's Red Mill Stone-Ground)
5 ounces Gorgonzola cheese (I used Stilton and probably only used 2-3 ounces. This was pretty mild, but perfect for me since blue cheese can be overwhelming.)
1/2 cup heavy cream (I'll try 1/2 and 1/2 next time)
1/2 teaspoon freshly grated nutmeg (again, an ingredient that can overwhelm for me - I used just a sprinkling)
2 teaspoons salt (this sounded like way too much - I used a 1/2 teaspoon at most)
Freshly ground black pepper
2 tablespoons shredded Parmesan cheese (optional), for garnish (I skipped this - it was rich enough and I was not baking it)

1. Set the rice cooker for the Quick Cook or regular cycle. Place the butter in the rice cooker bowl. When melted, add the onion and cook, stirring a few times, until soft, about 8 minutes. Add the stock, milk, and polenta; whisk to combine. Close the cover and reset for the Porridge or regular cycle. A few times during the cooking, open the cover and stir the polenta for 15 seconds, then close the cover.

2. Coat 6 cups of a standard muffin tin with butter-flavored nonstick cooking spray or grease them with butter. (I skipped the baking step altogether and went with creamy polenta.)

3. At the end of the second Porridge cycle (their creamy polenta recipes call for putting the polenta through a second Porridge cycle - I didn't think this was necessary and skipped this part. If I had used more liquid initially, this may have been necessary.), or when the regular cycle completes, stir in the cheese, cream, nutmeg, salt and black pepper to taste. Using a plastic soup ladle, divide the polenta among the 6 muffin cups, filling to the brim. Let come to room temperature. At this point, you can cover with plastic and refrigerate overnight.

4. Preheat the oven to 400º. Brush a small earthenware roasting pan with olive oil.5. Remove the polenta from the muffin tin and place in the roasting pan (not touching each other). Sprinkle the Parmesan cheese on top, if using. Bake until hot, 15 to 20 minutes. Serve immediately, using a metal spatula to remove the polenta from the pan.

Awesome comfort food. And if you use your rice cooker, you don't even have to heat up the kitchen (which is nice since it's still summery here). I made a lot of modifications, so I hope it's not confusing. Everyone in my family raved and I sat at the pot, testing, moaning and groaning, eyes rolling back in my head.

Sunday, September 18, 2005

Oatmeal in the Rice Cooker

One of the reasons I got a rice cooker was to be able to cook oatmeal overnight and have it ready to go in the morning. I have been trying to get away from those little Quaker Oats packages that are full of additives and other junk.

I tried quick-oats in the rice cooker once, only because that's all I had on hand. As I suspected, they came out a little mushy. Regular oats work much better. I'd love to be able to use milk, but letting milk sit in the machine all night doesn't seem wise.

All I do is follow the directions on the oatmeal package, set the timer to be ready for whatever time in the morning, add a few things like brown sugar, cinnamon, and a pinch of salt. The machine leaked a little the first time, so I add just a little less water than the recipe calls for.

One thing I found didn't work so well was adding raisins the night before. They come out really soft, almost mushy - I didn't like the texture. So now I add them after it's finished cooking along with some nuts - walnuts, pecans or almonds.

Sometimes the oatmeal is a little thick since I use less water, so I'll add some milk to get it the right consistency - at least this way, I can still have a little milk in the oatmeal.

I have also tried steel-cut oats with great success. I tried them overnight and the machine did leak a little through the top vent. So, I tried them in the morning with a little less water so that I could keep and eye on them and see if it leaked with less water. This time it leaked even more! I have to figure that letting them sit overnight allows the oats to soak up some of the water, resulting in less spill-over. Now I only do them overnight, adding just a tad less water than the recipe calls for and add a bit of milk the next morning to get the right consistency.

It's so nice to have a nice pot of oatmeal ready to go in the mornings without all the additives and without taking any extra time to prepare it.

Risotto in the Rice Cooker, Round 2.

Alrighty then. I took another stab at risotto in the rice cooker and ended up with much better results.

First, I'll post the rough recipe and directions:


Risotto with Caramelized Onions and Fontina Cheese
Source: Me, with inspiration from The Ultimate Rice Cooker Cookbook

2 tablespoon olive oil, divided
2 tablespoon butter, divided
1 clove garlic, crushed
1 cup + 2 tablespoons Arborio rice
1/2 teaspoon dried thyme
1/2 teaspoon salt
freshly ground black pepper to taste
1/2 cup sherry
1 can fat-free chicken stock + a bit more liquid to add at the end
1/2 cup caramelized onions, chopped
1/2 cup Fontina cheese, grated

1. Set the rice cooker to "Quick Cook" and add 1 tablespoon of olive oil and 1 tablespoon of butter. Add crushed garlic and saute about 1-2 minutes.

2. Add rice and cook, stirring frequently. (At this point I was all set to add my wine and cook until it was absorbed. However, the rice cooker started counting down and I was afraid it would not sustain enough temperature for long enough to get the liquid absorbed, so I reset it. When I reset it, the rice cooker would not go back to "Quick Cook". It apparently will not take your cooking selection if the cooker is too hot. I waited for it to cool down and then set it back to "Quick Cook".) Add sherry and stir until liquid is absorbed. Add chicken stock, stir and close rice cooker.

3. Reset cooker to "Regular" setting. (Again, I had a problem with the cooker not resetting, presumably due to being too hot. I had to let it sit a bit before I could get it to reset to "Regular". This little problem is annoying and makes the whole process take longer. I need to look into setting the cooker to whatever setting I will ultimately be using and seeing if it gets hot enough to get me through the saute phase.) Cook for about 20-30 minutes or until most of the liquid is absorbed. (I checked at the recommended 20 minutes, but it had not really reached a rolling boil. At about 25-28 minutes, it hit a rolling boil and was just about done.) Reset cooker to "Keep Warm".

4. Stir rice thoroughly. Add the remaining olive oil and butter, if desired. Stir in caramelized onions and Fontina cheese. Add more liquid if necessary to get the desired consistency.

The difference this time was that I set the rice cooker to the "Regular Cycle" and monitored the time, rather than letting the cooker determine when the rice was done. After the rice reached an acceptable texture, I reset the rice cooker and set it to "Keep Warm". I also find that by adding a bit of stock or other liquid at the end, when the risotto is finished cooking, I can get a better consistency (re: less gloppy) - if I add the liquid only when it's simmering, it gets absorbed.

Well, I think I can safely say that risotto works quite well in the rice cooker. It may not be truly authentic, but it was much easier than standing over the stove for 20 minutes and it didn't overheat the kitchen. I'll definitely be more likely to make risotto now that I've found an easier way. And my whole family is happy about that!

Risotto in the Rice Cooker

Someone on the Cooking Light board recommended The Ultimate Rice Cooker Cookbook by Beth Hensperger and Julie Kaufman. I have had relative success using recipe from this book, but find that the rice is often too soft and mushy for my tastes, so I need to concentrate on reducing the liquid for most recipes.

There are several recipes for risotto in this book and I must admit that I was very, very skeptical that one would be able to produce a good risotto from a rice cooker. After all, the secret to good risotto is in the stirring. Skepticism aside, I thought it was worth a go - wouldn't it be nice to have risotto in the summer without having to heat up the kitchen???

My first attempt came out tasty, but quite mushy. Here is the recipe:

Dried Mushroom Risotto
Source: The Ultimate Rice Cooker Cookbook

Machine: Medium (6-cup) or large (10-cup) rice cooker; fuzzy logic or on/off
Cycle: Quick Cook and/or regular or Porridge
Yield: Serves 4 to 5

1/2 ounce dried mushrooms
1 3/4 cups hottest possible tap water
About 1 1/2 cups beef, chicken, or vegetable stock
1 tablespoon olive oil
1 tablespoon unsalted butter
1/2 cup minced onion
1/4 cup dry white wine
1 cup plus 2 tablespoons medium-grain risotto rice (superfine Arborio, Carnaroli, or Vialine nano)

To Finish:
2 teaspoons unsalted butter, or more, if desired
2 tablespoons chopped fresh Italian parsley leaves
1/4 cup freshly grated Parmesan cheese, plus more for serving
Freshly ground black pepper
Salt

1. Place the mushrooms in a small bowl and add the hot water. Let stand for an hour or longer. (Or combine the mushrooms and water in a microwave-safe container, cover tightly with plastic wrap, and microwave on high for 5 minutes. Let cool to room temperature.) When mushrooms are soft, remove them from the liquid, squeezing gently to extract as much liquid as possible. Slice the mushrooms into pieces about 1/4 x 1 inch, discarding any tough stems. The exact size is not important, but if you cut them too small, their flavor will not be as intense. Carefully pour the mushroom soaking liquid into a measuring cup, leaving any grit behind. (If the mushrooms were especially gritty, you may want to pour the liquid through a coffee filter-lined strainer, but in general this is not necessary.) Add the stock to the mushroom soaking liquid to equal 2 cups.

2. Set the rice cooker for the Quick Cook or regular cycle. Place the olive oil and butter in the rice cooker bowl. When the butter melts, add the onion. Cook, stirring a few times, until softened, about 2 minutes. Stir in the wine and cook for 1 or 2 minutes. Add the rice and stir until the grains are evenly coated and hot. Cook, stirring occasionally, until the grains are transparent except for a white spot on each, 3 to 5 minutes. Add the stock mixture and mushrooms to the rice; stir to combine. Close the cover and reset for the Porridge cycle, or for the regular cycle and set a timer for 20 minutes.

3. When the machine switches to the Keep Warm cycle or the timer sounds, open the cover and stir with a wooden or plastic rice paddle or wooden spoon. The risotto should be only a bit liquid and the rice should be al dente, tender with just a touch of tooth resistance. If needed, cook for a few minutes longer. This risotto will hold on Keep Warm for up to 1 hour.

4. When ready to serve, add the butter. Close the cover for a minute to let the butter melt. Stir in the parsely, cheese, a few grinds of pepper, and salt to taste. Serve immediately.

The resulting risotto was very flavorful, but too mushy. I cooked it on the porridge cycle and followed the directions closely. I like to have a nice grain to bite into. I'm not sure if the mushiness was due to too much liquid, too long a cooking time or both. Next time I try risotto in the rice cooker, I plan to try a little less liquid and will try cooking it on the regular cycle for 20 minutes.

My new toy......a Rice Cooker

After reading many different posts on the Cooking Light boards about rice cookers, I was convinced - I had to have one! After doing much research, I ended up with this one:


It's a Zojirushi NS-ZCC10 5-Cup Neuro Fuzzy Rice Cooker. I got it for a great price on Amazon.

Even though I wasn't sure if this was a wise investment, I have found that we now eat more rice. It's just so easy to throw things together, forget about it and have it ready and waiting when you're ready for it. I like the fact that I don't have to watch it and that it doesn't overflow onto the stove. During the hot summer months, it's nice to be able to cook things without heating up the kitchen. Another advantage is that it frees up more burners on the stove.

On-the-Fence Brownies

Here are the brownies that I tried yesterday. This recipe came from my King Arthur catalog. Normally I turn my nose up at any brownie recipe that calls for only cocoa and not melted chocolate, but I decided to try this one anyway.


On-the-Fence Brownies
Source: King Arthur

Fudgy, cakey, fudgy, cakey... can't make up your mind? These brownies combine the best of both worlds: the fudge brownie's ultra-moist texture, and the nice rise of a cake brownie.

1 cup unsalted butter (2 sticks)
2 1/4 cups sugar
1 1/4 cups Dutch-process cocoa
1 teaspoon salt
1 teaspoon baking powder
1 tablespoon vanilla extract
4 large eggs
1 1/2 cups King Arthur Unbleached All-Purpose Flour
1 cup chocolate chips (6 ounces)
1 teaspoon espresso powder
1 cup chopped walnuts or pecans (optional)

1. In a medium-sized microwave-safe bowl, or in a saucepan set over low heat, melt the butter, then add the sugar and stir to combine. Return the mixture to the heat (or microwave) briefly, just until it's hot (about 110°F to 120°F), but not bubbling; it'll become shiny looking as you stir it. Heating this mixture a second time will dissolve more of the sugar, which will yield a shiny top crust on your brownies.

2. Stir in the cocoa, salt, baking powder, and vanilla. Whisk in the eggs, stirring until smooth; then add the flour, chips, espresso powder, and nuts, again stirring until smooth. Spoon the batter into a lightly greased 9 x 13-inch pan.

3. Bake the brownies in a preheated 350°F oven for 28 to 30 minutes, until a cake tester inserted into the center comes out clean, or with just a few moist crumbs clinging to it. The brownies should feel set on the edges and in the center (barely). Remove them from the oven and cool on a rack before cutting and serving. Yield: Two dozen 2-inch brownies.

As luck would have it, I ended up going way beyond tweaking. First, I found that I did not have enough white sugar, so I used about 1 cup of white sugar and 1 cup of brown sugar. Next, I found that I had less than half a cup left of Dutch-process cocoa, so I used regular cocoa to make up the difference. I did not have any espresso powder or nuts, so I skipped those completely. I also did not add the chocolate chips to the batter, but instead, melted just over a half cup of chips into the butter mixture. Hmmmm....not very similar to the original recipe!

Even after all of my omissions and substitutions, these brownies came out very nicely. They had a nice, rich chocolate flavor without being too rich. They were nice and thick and very moist near the middle of the pan, but they held together nicely, not too gooey. The edges were a bit dry, but moist enough.

I would prefer a slightly chewier brownie, but I was pretty pleased with this one. I would like to make these again, but would like to try it with all white sugar, all Dutch-process cocoa and my addition of the 1/2 cup of melted chocolate chips.

However, before I try tweaking this recipe again, there are several others I'd like to try first. But first I have to re-stock my baking supplies - I'm out of all-purpose flour, sugar and down to my last stick of butter!

Saturday, September 17, 2005

My little spot in cyberspace...

...to jot down ideas and thoughts about cooking.

I'm not a professional, just a home cook who likes to try new things and experiment here and there. This may not be the most creative blog, but I hope someone out there will enjoy it and maybe even find it fun and informative. I tend to be practical and simple in my application...when I go somewhere to read or find information, I want it to be easy on the eyes and well-organized, not fussy or hard to read.

Currently I work part time at the elementary school my son attends. It's not my dream job, but it brings in a little money and I can still be home with my boys when they are off from school.

I'd love to do something food-related, but find the whole thought a bit intimidating. Every month I seem to have a new idea. First I thought I might try to market my marinara sauce that was published in the reader section of Cooking Light. Then I thought about opening a food store that would cater to the busy mom who still wanted to put something homemade and wholesome on the table. I also considered trying to be a personal chef.

The problem is, I want to do something on my terms, on my time, my way and without a lot of financial risk. None of those ideas fit. Being a personal chef allows me to do something without a lot of overhead, but I'd have to cook what OTHER people want to eat, not what I want to make.

The idea du jour is to try offering cooking classes. I have lots of ideas for fun themes, the problem would be to find interest. I'm not sure what kind of business I can drum up in this tiny little rural town. However, there is the option to offer classes in nearby towns as well.

In the meantime, I figured I can record thoughts. At least here I can talk about what I want to talk about - people can read it or not read it - and there's no overhead or financial risk.

Alysha

Saturday, September 03, 2005

Sugar Cookies

Source: The Martha Stewart Cookbook

4 1/2 cups flour
4 teaspoons baking powder
1 teaspoon salt
1/2 pound (2 sticks) unsalted butter -- softened
2 cups sugar
2 eggs
1/2 cup milk
1/2 teaspoon vanilla extract

Preheat the oven to 375 degrees. Butter baking sheet or line with parchment paper. Sift together the dry ingredients.

Cream the butter and sugar until fluffy. Add the eggs and beat well. Add the dry ingredients, 1 cup at a time, alternating with the milk and vanilla, beating well after each addition. Wrap and chill dough for at least an hour.

Divide the dough into 4 pieces. Roll 1 piece at a time on a floured board and cut with large cookie cutters. Bake for 8-10 minutes. Cool on racks.

I talked about this recipe HERE.

Shrimp Risotto

1 tablespoon butter
3-4 shallots, minced
4 garlic cloves, minced
1 1/4 cups arborio rice
1 cup dry white wine
4 cups fish stock, warmed
35 shrimp, peeled and deveined

2 tablespoons - 1/4 cup heavy cream
1 tablespoon butter
more vegetable stock as needed
1 tablespoon of white truffle oil (optional)

2 tablespoons of parsley

Melt butter in a large saucepan over medium heat. Add shallots and garlic; saute until softened. Add rice and stir, about 3-5 minutes. Add wine; stir until most of the liquid is absorbed. Add warmed stock in 1/2-cup amounts, stirring after each addition until most of the liquid is absorbed. Test rice after the first 3 or 4 additions of stock to check for doneness. When rice is close to being done, add one more ladle of stock along with the shrimp. Stir until most of the liquid is absorbed. Just before serving risotto, add the last 4 ingredients, including a bit more stock if risotto is too thick and gummy. Adding a bit of liquid and fat at the end, makes for a nicer, less gummy consistency. Add parsley and serve.

Makes about 7 small servings.

Finger-Licking Peanut Sauce

Source: Cooking Light

1/2 cup fat-free, less-sodium chicken broth (I often use just water)**
1/4 cup chunky peanut butter (I use natural peanut butter
1/4 cup low-sodium soy sauce
3 tablespoons brown sugar
2 tablespoons rice vinegar
2 teaspoons grated peeled fresh ginger
2 teaspoons chile paste with garlic
4 garlic cloves, minced

Combine first 8 ingredients in a small saucepan. Cook over medium heat 5 minutes or until smooth, stirring frequently. Remove from heat.

**If you're using this as a dip and want the sauce to be thick, just add a bit at a time until you reach the desired consistency.

Friday, September 02, 2005

Russian Tea Cakes

Source: AllRecipes

1 cup butter
1 teaspoon vanilla extract
6 tablespoons confectioners' sugar
2 cups all-purpose flour
1 cup chopped pecans
2 teaspoons milk (I added this to help the dough come together)
1/3 cup confectioners' sugar for decoration

1. Preheat oven to 350 degrees F (175 degrees C).

2. In a medium bowl, cream butter and vanilla until smooth. Combine the 6 tablespoons confectioners' sugar and flour; stir into the butter mixture until just blended. Add milk if necessary to help dough come together. Mix in the chopped walnuts. Roll dough into 1 inch balls, and place them 2 inches apart on an ungreased cookie sheet.

3. Bake for 12 minutes in the preheated oven. When somewhat cool, roll in remaining confectioners' sugar. I also like to roll mine in the sugar a second time, especially if the first coating begins to get a little gummy which can happen if cookies are warm when rolled in the sugar.

I talked about this recipe HERE.

Chocolate Crackles

Source: Martha Stewart

8 ounces bittersweet chocolate, melted and cooled
1 1/4 cups all-purpose flour
1/2 cup Dutch-process cocoa powder
2 teaspoons baking powder
1/4 teaspoon salt
8 tablespoons unsalted butter (1 stick) room temperature
1 1/3 cup light-brown sugar
2 large eggs
1 teaspoon pure vanilla extract
1/3 cup milk
1 cup confectioners' sugar

Heat oven to 350 degrees. Chop chocolate into small bits. On top of the stove, set a heatproof bowl, or the top of a double boiler, over a pan of simmering water. Melt the chocolate over medium heat. Set aside to cool. Sift together the flour, cocoa, baking powder, and salt.

In the bowl of a heavy-duty electric mixer fitted with the paddle attachment, beat the butter and light-brown sugar until light and fluffy. Add the eggs and vanilla, and beat until well combined. Add the melted chocolate. Add the dry ingredients alternately with milk. Mix on a low speed until just combined. Divide the dough into quarters, wrap with plastic wrap, and chill in the refrigerator until firm, about 2 hours.

Divide each quarter into 16 1-inch balls. Roll in confectioners' sugar, coating thoroughly. Place the cookies on a Silpat-lined baking sheet two inches apart. Bake until the cookies have flattened and the sugar splits, 12 to15 minutes.

Transfer from oven to a wire rack, and let cool completely. Store in an airtight container for up to one week.

I talked about this recipe HERE.

Beef Bourguignonne with Egg Noodles

Source: Cooking Light, September 2004

1/3 cup all-purpose flour
2 teaspoons salt, divided
3/4 teaspoon freshly ground black pepper, divided
2 1/4 pounds beef stew meat
3 slices bacon, chopped and divided
1 cup chopped onion
1 cup sliced carrot
4 cloves garlic, minced
1 1/2 cups dry red wine
1 (14 ounce) can less-sodium beef broth
8 cups halved mushrooms (about 1 1/2 pounds)
2 tablespoons tomato paste
2 teaspoons chopped fresh thyme
2 bay leaves
1 (16 ounce) package frozen pearl onions
7 cups hot cooked medium egg noodles (about 6 cups uncooked noodles)
3 tablespoons chopped fresh flat-leaf parsley

Combine flour, 1 teaspoon salt, and 1/4 teaspoon pepper in a latge zip-top plastic bag. Add beef; seal and shake to coat.

Cook half the bacon in a large Dutch oven over medium-high heat until crisp. Remove bacon from pan with a slotted spoon; set aside. Add half of beef mixture to drippings in pan; cook 5 minutes, browning on all sides. Remove beef from pan; cover and keep warm. Repeat procedure with remaining bacon and beef mixture. Remove beef mixture from pan; cover and
keep warm.

Add chopped onion, sliced carrot, and minced garlic to pan; saute 5 minutes. Stir in red wine and broth, scraping pan to loosen browned bits. Add bacon, beef, remaining 1 teaspoon salt, remaining 1/2 teaspoon pepper, mushrooms, tomato paste, chopped thyme, bay leaves, and pearl onions; bring to a boil. Cover, reduce heat, and simmer 45 minutes. Uncover and cook 1 hour or until beef is tender. Discard bay leaves. Serve beef mixture over noodles; sprinkle with parsley.

Serves 9.

Serving size: about 1 cup beef mixture, 3/4 cup noodles, and 1 teaspoon parsley - 447 cal, 14.6g fat, 32.7g pro, 45.7g carb, 3.9g fiber, 117mg chol, 6mg iron, 677mg sod, 47mg calc.

Cheeseburger Soup

Adapted from: Cate from Sweetnicks, as posted on the CLBB

1/2 pound hamburger
2 cloves garlic, crushed
3/4 cup chopped onions
3/4 cup diced celery
3/4 cup mixed bell peppers , chopped
3 cups diced potatoes
1 can less-sodium beef broth
1 cup water
2 tablespoons butter
1/4 cup flour
1-1/2 cup milk
2 cups extra-sharp cheddar cheese, shredded
1 teaspoon dried basil
3/4 teaspoon salt
1/4 teaspoon pepper
2 tablespoons fresh parsley, chopped
1/2 cup light sour cream

Brown hamburger in a large stock pot or Dutch oven. Remove hamburger from pan and set aside. To the same pan add garlic, onion, and celery. Saute until onion begins to soften. Add peppers and saute for 1-3 minutes. Add potatoes, beef stock and water. Bring to a boil and simmer for about 15 minutes, or until potatoes are tender.

While potatoes are simmering, heat 2 tablespoons butter in a heavy saute pan over medium heat. Add flour, whisking constantly for about 5 minutes. Gradually add milk, whisking constantly. Add basil, salt and pepper. Whisk until milk mixture begins to thicken. Remove from heat and stir in cheese; stir until cheese is melted.

Add hamburger and cheese mixture to the soup pot with the potatoes. Heat through. Add sour cream and parsley and gently warm.

Baked Barley with Shiitake Mushrooms and Caramelized Onions

Source: Cooking Light

Slow baking allows the barley to absorb the woodsy flavor of the mushrooms and the sweetness of the caramelized onion.

2 tablespoons butter (substitute 2 tablespoons of olive oil for a vegan version of this recipe)
4 1/2 cups chopped onion (about 3 medium)
1 teaspoon sugar
(for vegan, skip or sub raw sugar)
3 cups sliced button mushrooms (about 9 ounces)
3 cups sliced shiitake mushroom caps (about 8 ounces)
1 1/2 cups uncooked pearl barley
1 tablespoon low-sodium soy sauce
1/4 teaspoon salt
1/4 teaspoon black pepper
1/8 teaspoon dried thyme
4 cups vegetable broth
Fresh thyme sprigs (optional)

Melt butter in a Dutch oven over medium heat. Add onion and sugar; cover and cook 25 minutes or until golden brown, stirring frequently. Add mushrooms; cook 10 minutes or until browned, stirring frequently. Add barley; cook 2 minutes, stirring frequently. Remove from heat. Stir in soy sauce, salt, pepper, and thyme.

Preheat oven to 350°.

Bring broth to a boil in a medium saucepan. Pour broth over barley mixture; cover and bake at 350° for 1 hour or until barley is tender. Let stand 10 minutes. Garnish with thyme sprigs, if desired.

Yield: 6 servings (serving size: 1 2/3 cup)

NUTRITION PER SERVING: CALORIES 292(17% from fat); FAT 5.4g (sat 2.6g,mono 1.2g,poly 0.6g); PROTEIN 9.5g; CHOLESTEROL 10.4mg; CALCIUM 42mg; SODIUM 908mg; FIBER 10.7g; IRON 2.4mg; CARBOHYDRATE 55.1g

Jeanne Lemlin
Cooking Light, MARCH 2003

I talked about this recipe HERE.

Sausage, Escarole and White Bean Ragout


Source: Cooking Light

The flavorful sausage and bold escarole are filling additions to this French-accented stew. Substitute mustard greens to mimic the bitter flavor of escarole, or use spinach for milder flavor. Serve with a crusty baguette or rolls.

12 ounces sweet turkey Italian sausage
Cooking spray
1 cup prechopped onion
1 cup cubed peeled red potatoes (about 6 ounces)
1/3 cup chardonnay or other dry white wine
1 tablespoon bottled minced garlic
1 (16-ounce) can cannellini beans or other white beans, rinsed and drained
1 (14-ounce) can fat-free, less-sodium chicken broth
4 cups sliced escarole (about 4 ounces)
1 teaspoon chopped fresh rosemary
2 tablespoons grated fresh Parmesan cheese

Remove casings from sausage.

Heat a large nonstick skillet over medium-high heat. Coat pan with cooking spray. Add Italian sausage and onion to pan, and cook for 4 minutes or until sausage browns, stirring to crumble. Drain sausage mixture well; return to pan. Stir in potatoes, wine, garlic, beans, and chicken broth; bring to a simmer. Cover and cook 7 minutes. Stir in escarole and rosemary, and cook for 4 minutes or until the escarole wilts, stirring occasionally. Ladle 1 1/4 cups soup into each of 4 shallow bowls, and sprinkle each serving evenly with 1 1/2 teaspoons cheese.

Yield: 4 servings (serving size: 1 1/4 cups soup and 1 1/2 teaspoons cheese)

NUTRITION PER SERVING: CALORIES 254(33% from fat); FAT 9.2g (sat 2.9g,mono 3.2g,poly 2.7g); PROTEIN 21g; CHOLESTEROL 74mg; CALCIUM 86mg; SODIUM 929mg; FIBER 4.9g; IRON 2.6mg; CARBOHYDRATE 21.2g

Melanie Barnard
Cooking Light, DECEMBER 2006

I talked about this recipe HERE.

Fettucine with Butternut and Gorgonzola Sauce

Source: Cooking Light

This rich dish works well for a dinner party--simply add a tossed salad, bread, and wine. Gorgonzola is a creamy blue cheese that creates a luscious sauce. If you use another type of blue cheese, the sauce will still taste great but not be as creamy. To help cut prep time, look for prechopped butternut squash, which some large supermarkets stock in the produce section.

1 tablespoon butter
3 cups vertically sliced onion
3 cups (1-inch) cubed peeled butternut squash (about 1 pound)
1 1/4 teaspoons salt, divided
1/2 teaspoon freshly ground black pepper
2 garlic cloves, minced
3 cups 1% low-fat milk, divided
3 tablespoons all-purpose flour
1 1/2 cups (6 ounces) crumbled Gorgonzola cheese, divided
8 cups hot cooked fettuccine (about 1 pound uncooked pasta)
1/4 cup chopped fresh parsley
1/4 cup coarsely chopped walnuts, toasted
1 teaspoon grated lemon rind

Melt butter in a large nonstick skillet over medium-high heat. Add onion, squash, 1/4 teaspoon salt, and pepper; sauté 6 minutes or until the squash is almost tender. Add minced garlic; sauté 1 minute. Cover and set aside.

Bring 2 cups milk to a boil in a saucepan. Combine the remaining 1 cup milk and flour, stirring well with a whisk; gradually add to boiling milk, stirring constantly. Reduce heat to medium, and cook 5 minutes or until slightly thick, stirring constantly. Remove from heat. Add 1 cup cheese, and stir until smooth.

Combine squash mixture, pasta, and cheese mixture in a large bowl. Sprinkle with remaining 1 teaspoon salt; toss well to combine. Sprinkle with 1/4 cup parsley, chopped walnuts, lemon rind, and the remaining 1/2 cup cheese. Serve immediately.

Yield: 8 servings (serving size: 1 1/4 cups)

NUTRITION PER SERVING: CALORIES 429(25% from fat); FAT 11.9g (sat 6.6g,mono 2.2g,poly 2g); PROTEIN 17.6g; CHOLESTEROL 26mg; CALCIUM 299mg; SODIUM 723mg; FIBER 5.4g; IRON 3mg; CARBOHYDRATE 65.5g

Julie Grimes Bottcher
Cooking Light, NOVEMBER 2006

I talked about this recipe HERE.

Beef Stroganoff


Source: based on Peggy's recipe on CLBB

1 pound beef such as sirloin or London broil (I used a chuck steak)
1 1/2 tablespoons butter
1 tablespoon olive oil
1 cup chopped onion
2 cloves garlic , minced or finely chopped
1/2 pound fresh mushrooms, sliced 1/4 inch thick
4 tablespoons flour
2 tablespoons tomato paste (I'd
1/8 teaspoon black pepper
1 can (10-1/2 oz) condensed beef broth, undiluted
1/2 cup dry sherry
1 tablespoon snipped fresh dill, or 1 teaspoon dried dillweed
1-1/2 cup light sour cream

1. Trim fat from beef. Cut crosswise into 1/2-inch thick slices. Cut each slice across grain into 1/2-inch-wide strips.

2. Slowly heat large, heavy skillet. In it, melt 1 tablespoon butter and olive oil. Add beef. Over high heat, sear quickly on all sides. Remove from pan and set aside.

3. Add and saute onion, garlic, and mushrooms until onion is golden - about 5 minutes. Remove from heat. Add flour, tomato paste and pepper; stir until smooth. Add beef back to pan if using a tougher cut like chuck. Otherwise follow direction for adding beef below. Gradually add beef broth; bring to a boil, stirring. Reduce heat and simmer for 5 minutes (15 minutes if using a tougher cut of beef).

4. Over low heat, add wine, dill and sour cream stirring until well combined. Add beef; simmer just until sauce and beef are hot.

5. Serve stroganoff over hot, cooked egg noodles or rice. Sprinkle with dill or parsley.

Makes 6 servings.

I talked about this recipe HERE.