Pages

Saturday, June 28, 2008

Garden Update: Sigh.........

Okay, let's start with the good news, shall we? 'Cause if I start with the bad news, I might not be able to see the keyboard and/or monitor through all of the tears..........

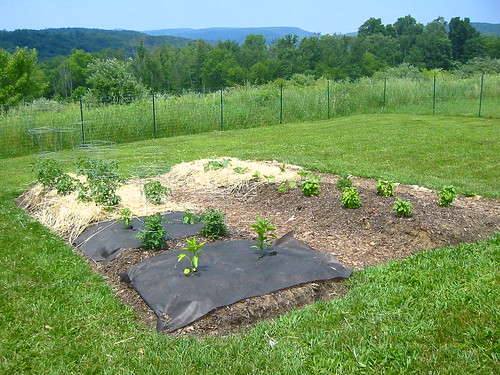
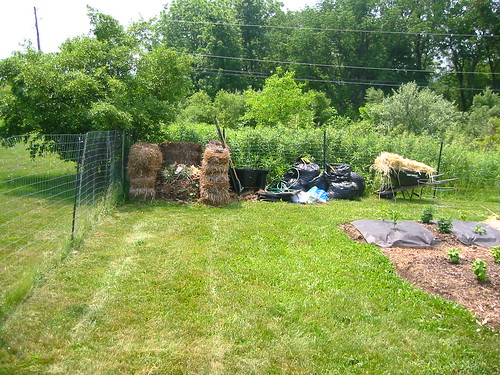
So, looks good from a distance, right?

garden

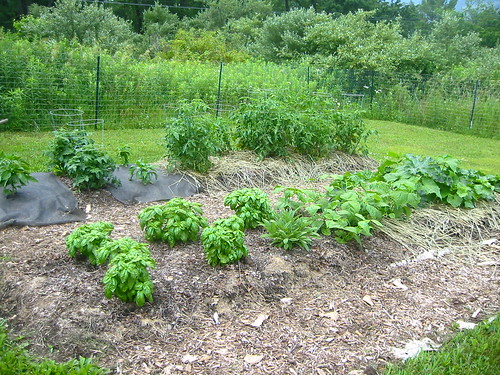
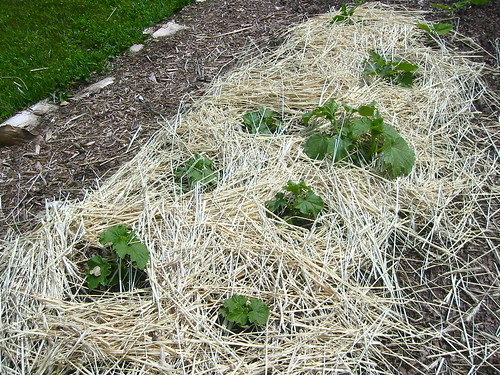
Let's get up close. By the way - the tops of the lasagna beds have remained virtually weed free. What I've pulled from near the plants would barely fill a 1/2 cup measuring cup. LOVING that part!

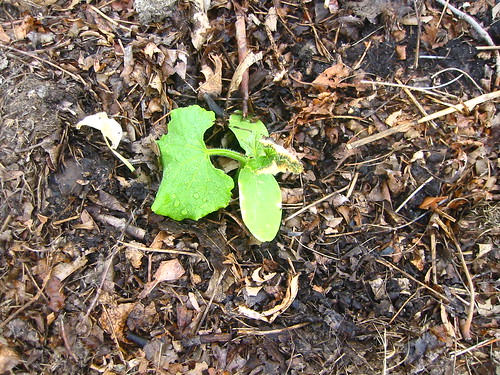
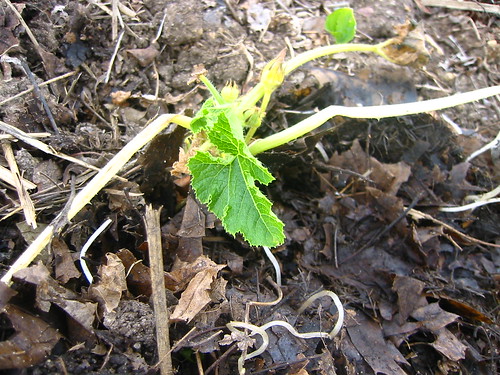
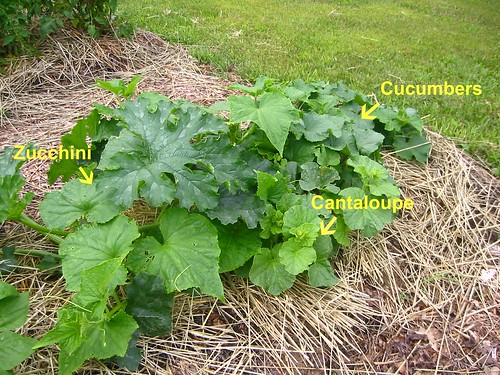
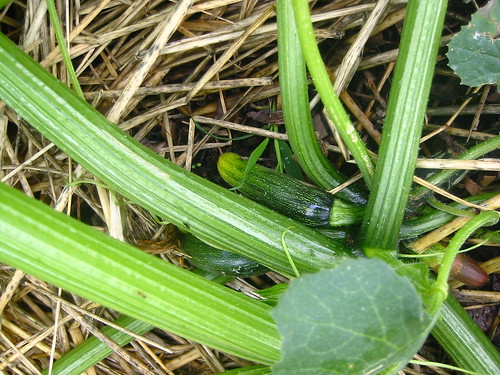
The cucumbers, zucchini and cantaloupe are just kind of one big mass of vines. I'm sure I planted them a bit too close together, but I figured it might work out okay......we'll see.

zucchini, cucumbers and cantaloupe vines

One thing I will definitely do differently with the vine-like plants is that even if I plant them close to each other again, I will NOT plant them close to other non-vine plants like my bush beans. I had to prune back some of the zucchini plant to keep it from encroaching.

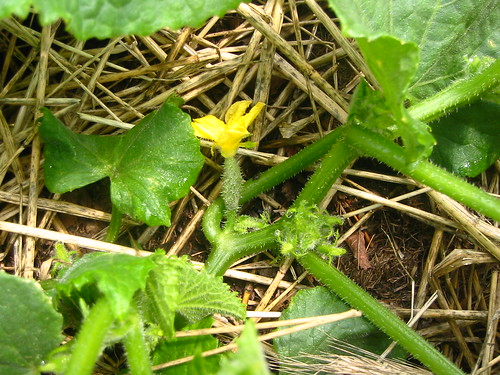
Lots of tiny cucumbers like this one.......

cucumber

And one larger cucumber.

cucumber

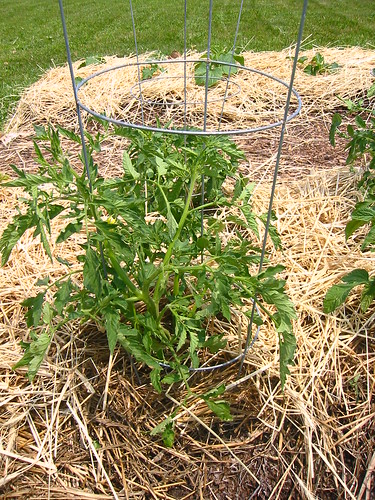
And 3 zucchini. Make that two.....the one on the right (with the browned out end) appears to be a goner......

zucchini

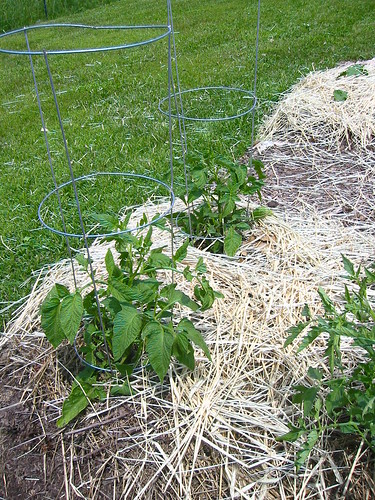
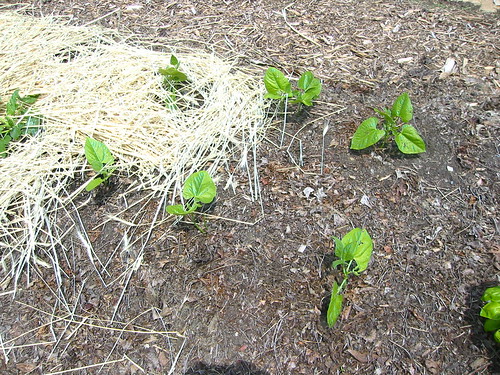
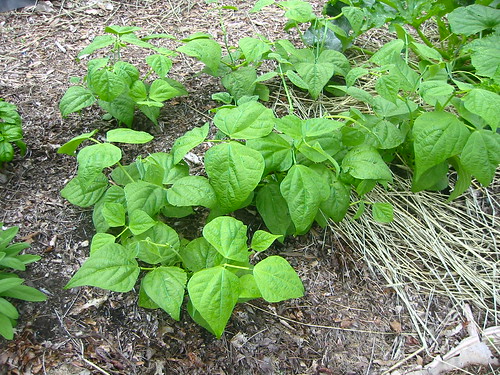
The bean plants look fine so far.

bush bean plants

The sage looks great.

sage

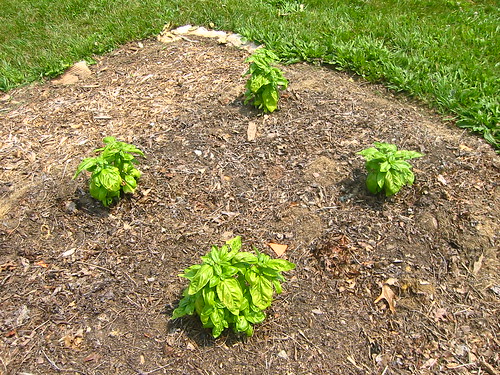
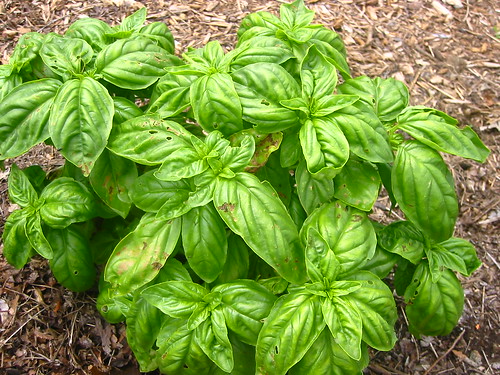
The basil is still chugging along. Not the best basil I've ever grown - the leaves still have some yellowing to them (I wonder if the soil is missing a key nutrient? Will have to read more on that.) and the flea beetles are still munching, but it's starting to get bushier and hopefully will really take off soon.

basil

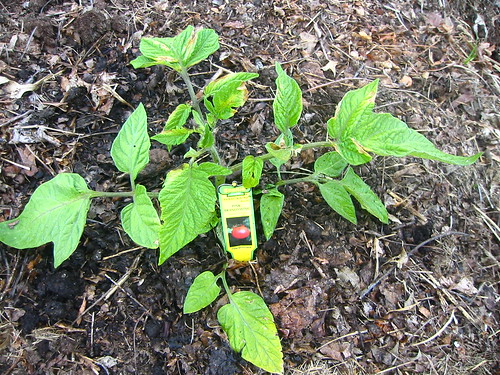
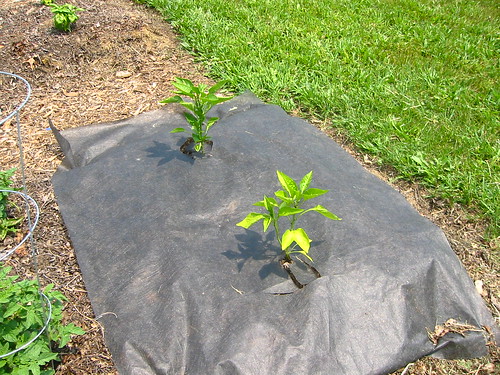
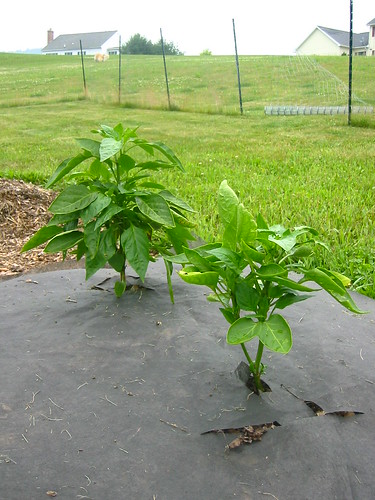
The peppers...still not sure about these. I keep seeing buds, but only a couple of flowers and no fruit set yet.

pepper plants

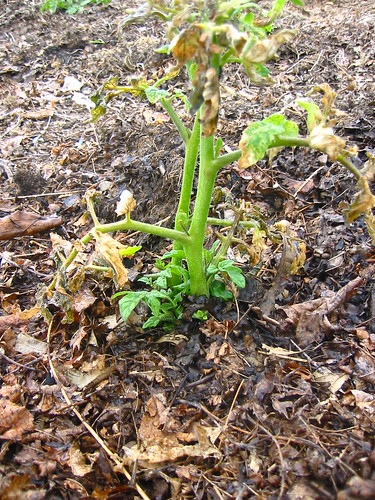
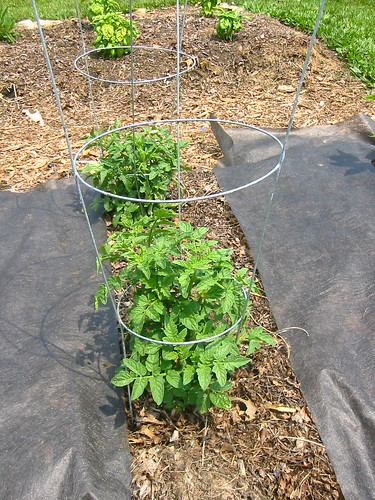
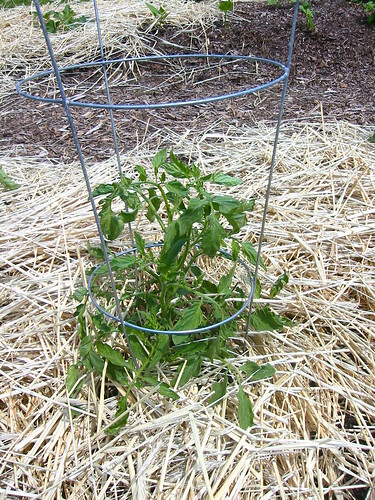
Here comes the bad part. The really depressing part. I planted 11 tomato plants and at this point, I don't know that I'll get a single tomato from any of them. How can that possibly be?? They were looking so lovely for a while there and then something happened. Whether it's fungal or bacterial, I'm not sure, but every stinkin' plant has this creeping crud.

diseased tomato plants

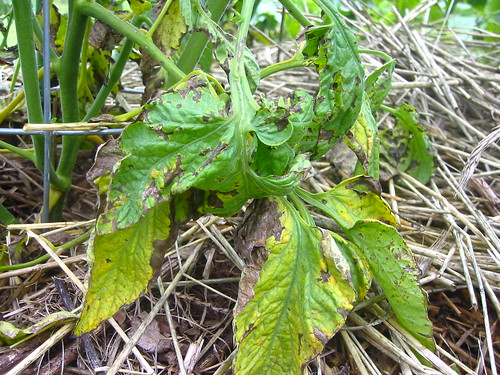
Not only that, but every blossom so far has dropped. The black crud is covering the blossoms and then they just break right off. Here's one that's just about to drop........

diseased tomato plants

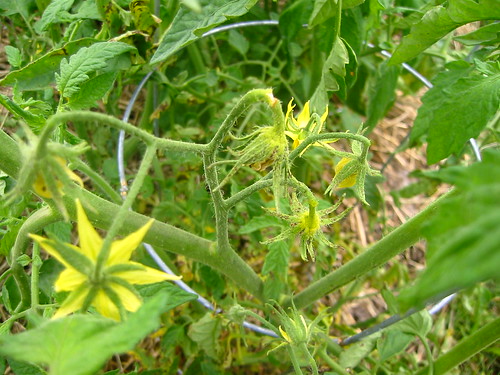
Well, okay, I did manage to find maybe 4-5 teeny tiny tomatoes on one of the 3 cherry tomato plants........but even one of those fruits has some black crud on it..........

cherry tomatoes

The crud is all over the place.......

diseased tomato plants

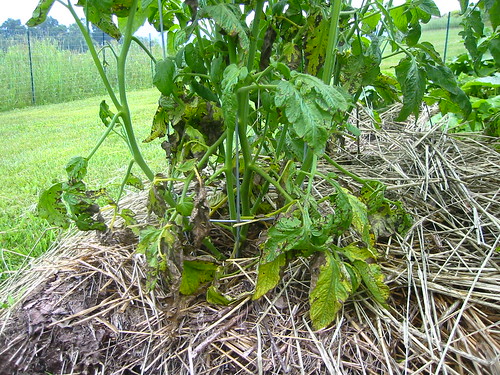
$%@#%^! I keep reading about how it's SO EASY to grow tomatoes. I feel like I'm being taunted!! I've seen people get so overrun with them that they start giving them away. I've never, ever had good luck with tomatoes. I've tried probably more than 10 different kinds and I've gardened in two different states and even in pots. No luck. Although, come to think of it, I think I got a decent yield the first year I tried tomatoes - before the plants succumbed to whatever disease they had that time.

This time, however, I hope to learn about what's going on rather than just piss and moan about it. I've taken a sample of some leaves to the local extension office and am waiting for a call back to find out what's wrong. I've been looking online at lots of tomato disease pictures, but they all start to look the same after a while and I can't figure it out. So far it looks most like the Alternaria Canker which can be found on leaves, stems and fruit. But if anyone out there reading this has any diagnoses or advice, I'd be happy to listen!

I wouldn't be surprised to find out it's fungal. We've been having a lot of warm, wet, humid weather lately and I've noticed lots of fungal critters growing around other areas of the yard.

I'll be shoving my nose into a lot of books and websites this winter to read more about disease-resistant varieties (depending on what the extension office says) and anything I can learn about growing tomatoes. And at least this time I'll have room to rotate the crops so that I'm not planting in that same bed again next year. I am determined to have a bountiful harvest some day!

I'm considering starting my own from seed......but I'm afraid that that will only make me even more vested in my plants and then even more heart broken if they fail. Note the use of the word 'if" in that last sentence, not "when". I remain optimistic. Or is it just plain stubborn? Eh, either way works.

Thursday, June 26, 2008

Bobby Flay: Boy Gets Grill

I don't know that I've ever made a Bobby Flay recipe before. No real reason, just haven't. But being that it's summer and we like to grill as much as possible, I picked up his cookbook, Boy Gets Grill (sequel to Boy Meets Grill) at the library a week or two ago. What I have discovered is that it's a darn shame I haven't cracked open one of his cookbooks earlier - so many of the recipes I've glanced over are calling out to be made. I wonder how many times I can renew this at the library before they make me bring it back?

The first recipe we tried - Crispy Bacon and Corn Quesadillas - we liked very much, but we had a number of problems in the preparation.

#1 - The first problem wasn't at all related to the recipe - it was the weather - it was pouring. DH should win the prize for the world's most committed and dedicated griller - he's grilled in the rain twice in the last week, one of them a thunderstorm.

#2 - Grilling bacon can be kind of tricky. At least for us. I guess the grill was too hot:

Grilling bacon!

#3 - Getting double-decked quesadillas onto the grill - oil side down - can be tricky too. I don't know how DH finally got them on, but I think he flipped them oil side down onto a plate first and tried to sort of slide them off onto the grill. He did manage to successfully flip them, but again, not so easy to do.

Crispy Bacon and Corn Quesadillas
with Avocado-Cherry Tomato Relish


#4 - Bobby Flay has crazy ideas about portion sizes. Our tortillas were 8-inch instead of 6-inch, but even with a 6-inch, a whole double-decker tortilla is a pretty large portion for us. Okay, so large portion sizes aren't really a problem, but still........

With the rain pouring down, I asked DH if he wanted to just do everything inside, but as I said, he was committed. And it did taste better - the tortillas had a nice charred/grill flavor to them, but the bacon - not surprisingly - was over done. I'll have to make sure that DH really keeps the grill a bit on the cooler side if we attempt bacon on the grill in the future.

The quesadillas were tasty - corn, bacon and cheese - can't really go wrong there - but the avocado relish was fantastic (though mine was probably chopped a bit too coarsely to really be considered a relish). I've made salads using similar ingredients before, but for some reason, this one tasted so much better. Maybe it was the jalapeno - that's something I don't normally use - I just don't think of it. Or it could have been the chives - again, something I don't normally use in this kind of dish as red onion or scallions tend to be the more commonly used ingredient. Bobby's actually does call for red onion, but I forgot to buy any, so I snipped some chives from the garden and they were really good with the rest of the flavors.

In the end, it all worked out and DH declared that it was worth the flaming bacon, the pouring rain and the tricky flipping. And since he's the grill master, who am I to argue?

Wednesday, June 25, 2008

Yummy, Comforting Pasta

Just a quick post tonight before I head off to bed.........

Although it's not really what I'd consider pasta weather at the moment, I'm actually still getting caught up on recipes from early this spring. This is a pasta dish from Rachael Ray that was full of flavor and oh-so-comforting.

Pasta with Swiss Chard and Bacon
There's quite a lot going on with the greens, the bacon, the ricotta and the lemon, but it all comes together nicely - I like it when you have an array of taste sensations to look forward to in each bite. If you can't find Swiss chard or happen to have other greens on hand, just about any kind of green would likely work well with this dish.

Mmmmm....just writing about this dish is making me crave pasta, but we're in grilling mode these days, so it may be a while before something like this hits the table again.....

Tuesday, June 24, 2008

Pea Soup and Panini

This dinner was an idea swiped directly from The Vicarious Farmer. Each week she has been sharing her CSA bounty and including some of the recipes she prepared using the fresh produce she picked that week. Yum.

fresh peas

We've made pea soup once before and it was well-received, but that recipe used frozen peas so I was eager to make use of the fresh peas in season at our farmer's market. Actually, the majority of the ingredients used in this meal made use of fresh, local ingredients, something I am trying to focus on, at least while the farmer's market is open this summer.

This recipe is from A Year in a Vegetarian Kitchen by Jack Bishop, a cookbook I've been using faithfully since I got bought it last winter. The soup calls for making a quick stock using the pea pods, scallions and parsley. I have to admit that I was rather reluctant to use my fresh-from-farmer's-market scallions for a broth where they would be boiled to death, but I took a deep breath and tossed them in.

Pea Soup and Panini

Once the broth is finished, it is strained and the peas are tossed in for a quick simmer, followed by the lettuce. I don't know if I quite understand the purpose of lettuce in pea soups, but according to The New Best Recipe (the source for the first pea soup we made), "A few ounces of Boston lettuce added along with the peas gave the soup a marvelous frothy texture when pureed." So, I guess it's for texture.

This recipe called for topping the soup with creme fraiche or sour cream, but I had some leftover cream from the farmer's market, so I added a half cup of this before pureeing the soup.

This soup was quite good, but I liked the recipe linked above better. I'd like to morph the two some day and make the Cook's Illustrated recipe with fresh peas in place of the frozen and using the pea pod broth in place of the chicken broth.

For the panini, I used Wegmans' Black Bean Salsa bread, fresh cheddar from a local farm and chopped chives. Very simple but flavorful - the bread gave just a touch of heat which was a nice contrast to the cool, creamy soup.

Local ingredients used: lettuce, scallions, peas, parsley (from my garden), cream, and cheddar cheese.

Sunday, June 22, 2008

Birthday Treats

My oldest son turned 14 this year. Gulp. He goes to high school next year! How can that be??

Anyway.........for his actual birthday a few weeks ago, he requested a chocolate and peanut butter cake. Today was his birthday party - a skating party - and we decided that instead of another cake, we'd try cupcakes - something a little easier to handle once we were at the rink.

I can't say that I was overly thrilled with the cake part of either of these recipes (which is why you'll find that I'm only linking to them instead of posting the full recipe here). I like a really deep, dark chocolate cake. Both cakes were fine, they just didn't wow me. I'm still going to share them because I did really like the peanut butter filling/icing for both.

Chocolate Peanut Butter Cake

The cake was a double layer chocolate cake with a peanut butter filling and chocolate icing. It turns out I was out of regular peanut butter for the filling so I subbed natural pb and it worked beautifully. In fact, I think it might have given the filling stronger peanut butter flavor which, in my book, is definitely a good thing. I was very pleased with the consistency and flavor of this filling and would definitely use this again.

Even with 2 sticks of butter and a 1/2 cup of sour cream, the cake turned out a bit dry. Could have been user error though - my oven tends to run a bit hot and sometimes things get a little overdone if I'm not vigilant.

The icing for this cake was very different from any I've made before - it was made with just sour cream and melted chocolate - that's it. I wasn't at all sure what to expect as far as consistency goes - turns out it was pretty similar to a ganache-type icing, just not quite as rich. I'm not sure I was crazy about the "sour" flavor of the sour cream in the icing and since there are other icings that I have liked better, I doubt I'd use this recipe again. It's too bad too, because it sure was easy! So, I will keep the pb filling filed away and keep searching for a better cake recipe.

Chocolate PB Cupcakes
For the cupcakes, it was somewhat the same story. I tried a recipe from Barefoot Contessa as I often hear raves about her baked goodies - probably because she's not shy with the cream or butter. The cake this time was nice and moist - much better than recipe above - but again, the chocolate flavor just wasn't there for me.

For the peanut butter icing, I used regular peanut butter as the recipe instructs because I wanted the icing to be light and fluffy and I wasn't sure that natural peanut butter would work quite as well here. The icing did in fact turn out nice and fluffy and although the peanut butter flavor wasn't quite as pronounced as with the filling above, it was still delicious and I think perhaps the more subtle peanut butter flavor was appropriate for an icing as opposed to a filling.

One note on the cupcakes. The recipe claims it makes 14-15 cupcakes. I increased the recipe by half and instead of ending up with about 22 cupcakes, I ended up with closer to 30. I may not have filled the muffin tins as full as I could have, but they were at least 2/3 full.

Even though neither of these baked treats were exactly home runs in my book, chocolate and peanut butter combinations are never complete failures - they may not have been fabulous, but it's pretty hard to go wrong with this popular combo.

So I guess I'm now on the lookout for a rich, chocolate cake that can measure up to what I taste in my head...........

Saturday, June 21, 2008

Father's Day: Scallops and King Crab Legs

So, back to our Father's Day menu. It appears I started with dessert first, but the savory dishes were just as delicious.

DH requested king crab legs. While buying the crab legs, I also bought a few scallops totally on impulse. I'm not terribly enamored of scallops - something about the texture - but DH loves them and I thought that Father's Day would be the perfect day to treat him. Since I've never actually cooked scallops myself, I had no plan whatsoever, but I knew we'd come up with something.

Basil Stuffed Scallops
I went to my reliable resource, the CLBB, and came upon this recipe which is apparently from Mark Bittman's How to Cook Everything. We had the lemons and garlic on hand and we had just enough basil in the garden to stuff the eight scallops I bought, so this jumped out at me. I was also intrigued by the idea of grilling the scallops. As I said, I'm not crazy about scallops but everything is better on the grill, right?

These were fantastic - DH raved and I might have changed my mind about scallops. While it takes a bit of time to slit each scallop and stuff them with the basil-garlic mixture, it's by no means a difficult recipe and with our small portion, it went pretty quickly. Just make sure to use plenty of extra-virgin olive oil on your scallops and on the grill or grill pan to keep them from sticking and things will work out fine. We chickened out of doing them directly on the grill rack, so we used our nonstick grill pan which is why we ended up with grill polka dots instead of the classic grill stripes. A little goofy looking, but it worked and certainly didn't hurt the flavor one bit.

King Crab Legs

We also did the crab legs on the grill which seemed to work pretty well. No recipe there, just following the package directions to basically grill them about 3 minutes on each side.

Spinach and Strawberry Salad

No recipe here either, but we did manage to fit in one veggie/fruit dish by serving a spinach, strawberry and toasted pecan salad with a strawberry vinaigrette. This Father's Day largely on the fresh strawberries we picked.....maybe it will become a tradition.

Friday, June 20, 2008

More Strawberries....

Well, we ended up making good use of our 16 quarts of strawberries and except for the 2 bags I froze, they are gone. But I think I know where I could score some more........

Father's Day fell shortly after our strawberry picking so I decided that strawberries were definitely going to be on the menu. I made a special desert that I've never made before - strawberry shortcake. When I think of dessert, I tend to think in terms of chocolate, but as the years pass, I've begun to think beyond chocolate and embrace other kinds of dessert.........and with delicious results.


This recipe from Martha Stewart's Everyday Food sounded delicious and looked easy to make - my kind of recipe. I also loved that the recipe called for making shortcake biscuits, creating individual shortcake portions. Somehow desserts just seem more special when everyone gets their very own portion with no slicing or cutting.

Shortcake biscuits are somewhat scone-like. They are subtly sweet and a bit crumbly, so be sure to let them cool completely and cut them with a very sharp and/or serrated knife. The biscuits are topped with strawberries that have been steeped with sugar to bring out their juices, followed dollop of homemade whipped cream with just a touch of vanilla. Top it off with the other half of the biscuit and you have a beautiful little dessert portion that comes together in no time.

This dessert was extra special because not only did we make it with strawberries we picked ourselves, I also scored some cream from a local dairy at our local farmer's market and used eggs from a small organic farm in our county that sells to a natural foods store in our area.

For a different twist on strawberry shortcake, check out eggs on sunday's twist involving chocolate. Too bad I didn't see that post before I made these! But then again, I'm trying to branch out, right?

More on our Father's Day menu to come....including a delicious basil-stuffed scallop recipe....

Monday, June 16, 2008

Toffee, Caramel, Cappuccino and Peppercorn.

That's not a list of what's cooking in my kitchen, that's the list of colors going in to our new kitchen. Please excuse this rather self-indulgent post, but The Savory Notebook's kitchen is getting a makeover!

And here's why.

171-7127_IMG

Hunter green counter tops. Yuck. Hunter green is fine as a limited accent color, but for something as permanent as counter tops. I can't seem to get away from hunter green. Our first house in Indiana had hunter green carpets and drapes in the bedroom. Double ugh. That's where the cappuccino figures in - we're doing Zodiaq quartz counter tops in cappuccino.

But to really appreciate just how far this kitchen will have come since we moved in, you must see how it looked before we removed the ugly wallpaper.........

121-2158_IMG

That picture was taken as we toured the house with the realtor. The same sort of wallpaper existed in various incarnations in the hallway upstairs and down and in all 3 bathrooms. We paid someone to come in and remove that almost immediately and it's probably the best money we ever spent. It looks much better now.......

171-7110_IMG

It's not just the counter tops with the hunter green, it's in the floor too. See that? More hunter green. The ugly vinyl is coming out and is being replaced with tile.

171-7118_IMG

And the sink. The faucet is so low it's maddening. Pair a low faucet with that divider in the middle and you're talking lots of potential for dish breaking and yes, we've broken a few these last 2 years. We'll put in a stainless steel undermount sink with a large single bowl and a tall faucet with lots of clearance for large pots and pans. I'm sure we'll still break a few dishes, but at least we'll have a fighting chance!

171-7113_IMG

We'll be ripping out all the existing oak cabinetry. The cabinets are in good condition, we just REALLY dislike oak. We'll be doing maple cabinets with a toffee finish. We looked into refacing, and although it would cut the costs by 1/3-1/2, we felt it would be an overall better value to replace. I was also surprised that the finishes available for refacing are quite limited - I wasn't really all that happy with any of the refacing finishes.

We'll also be replacing the island. It's fine as it is for storage, but it's not terribly functional. The current u-shape is nice for looking out into the family room while I'm prepping, but it leaves a lot of unused space between the sink area and the island. We're going for a rectangular design that will include a breakfast bar. I'm so excited about the breakfast bar. We had one for 7 brief months and even bought stools for it. Those stools have just been sitting in our dining room, waiting to be put to use. Other improvements to the island will be pull-out drawers for pots, pans and appliances, a trash cabinet and electrical outlets at either end. The island will be a slightly different style of cabinet and will have a dark, peppercorn finish for a little contrast to the lighter maple cabinets.

171-7111_IMG

171-7121_IMG

Other smaller improvements will include a real cabinet above the microwave. The former homeowners took out the existing cabinet to put in an over-the-range microwave. While I really like the OTR micro (but why oh why did they pick white to go with black and ss???), I'm not so fond of looking at the micro vent. Sloppy work.

171-7117_IMG

We'll also be taking out the brass-rimmed light box and putting in recessed can lighting on either side of the kitchen with two pendant lights over the island.

171-7119_IMG

As you can see from these pictures, we've already gotten rid of the white and brass flying saucer they used to have hanging in our breakfast nook area.

121-2161_IMG

I mean look at that thing.......it just wasn't "us".........

122-2250_IMG

Nothing fancy, but definitely more us.........

171-7134_IMG

Oh, and the caramel. That's a potential wall color. We'll be painting the kitchen and the family room ourselves after everything else is finished - that way we can save a little money and live with the kitchen a little bit before we make any paint choices.

So, that's it. As always, there are so many other things we'd love to do if money weren't an issue - like tearing out the soffit, replacing the white microwave, the ceramic stove (I prefer gas) and the dishwasher, but we're already doing a lot more than we dreamed we'd be able to, so no one's complaining. The appliances can be done a little at a time as budget allows. Of course DH likes to occasionally talk about blowing out the wall and expanding out......but that's just "if we won the lottery" talk..........

The contract is signed and hopefully work will start at the end of July. After that, there's still that darned hunter green sink in the half bath downstairs...........

Sunday, June 15, 2008

Strawberries and Chocolate

We are still making our way through the 16 quarts of strawberries. So far we have made Strawberry-Lime Sorbet, strawberry vinaigrette (if I figure out exactly what I did, I'll post a recipe), strawberry daiquiris (recipe turned out only so-so, so I'm not posting that one) and the recipe I'm sharing today.

In addition to wanting to find uses for our surplus of strawberries, I discovered that I had some sour cream in the refrigerator that was in danger of going bad and I thought maybe I could use it in some sort of strawberry recipe. It didn't take me long to find this post from Dagmar at a cat in the kitchen, reviewing an ice cream recipe from David Lebovitz's A Perfect Scoop. An ice cream that called for strawberries and sour cream - perfect! Until I found a recipe over at eggs on sunday for basically the same ice cream, but with bittersweet chocolate drizzled in. Even more perfect!

I tend to prefer custard-based ice creams - they are richer, denser and creamier. Cream-based ice cream tends to be, well, icy. But I was game to give this one a go, just to use up the sour cream. I was also heartened by the fact that it called for a bit of vodka, something that I swear by when making sorbets to keep them a bit soft, instead of hardening up into blocks of ice.


The chocolate part comes at the very end, when the ice cream has pretty much finished churning - you just drizzle the melted chocolate in thin streams and let it mix in your ice cream machine. As the chocolate hits the ice cream, it hardens and breaks up into very small pieces, giving you just a little bit of bittersweet chocolate in every bite.

This recipe was a bit too much for my Cuisinart ice cream machine - the ice cream mixture began to overflow the bowl toward the end, so I'd have to either cut the recipe back or churn it in two batches next time.

This ice cream isn't as lush and rich as I usually crave, but the flavors are fantastic. The sweet tang of strawberries hits you first. As the ice cream sits in your mouth, the frozen bits of chocolate begin to warm up and leave you with a nice finish of luscious, bittersweet chocolate.

If you like chocolate covered strawberries, you'll love this ice cream. As I wrote up this post, I stumbled upon this custard-based recipe for stracciatella ice cream. Looks divine! Guess I know what we'll be trying with some of our frozen strawberries later on this summer!

Friday, June 13, 2008

Gardening Update: So far, so good.....

After a rough start in which my garden got zapped twice by frost, things are looking up. We went from a frost on Memorial Day to temperatures in the 90s this past week! Most of the vegetables I planted love hot weather so things have started to take off. I wonder if they didn't get a little shocked with the sudden change though....

So, let's take a little tour around the garden.

Here's a shot showing the hopefully adequate fence we put up. A determined animal could certainly get past or under this fence, but we hope it deters most of the wild critters out there. I have seen an itty bitty baby bunny in the fenced-in area, but they grow fast and I figure he/she won't be able to fit through it too much longer. .I also had to remove the plastic plant tags that reminded me of the different varieties of tomatoes because the crows kept coming in and scattering them about the garden. Hopefully I will remember what is what!

garden fence

My plan is to build lasagna gardens all along the fence to hide it and eliminate the need to mow or weed whack near it. It will take quite a while to build that many beds, but it will be fun to intermix some flowers into the garden. I might even make use of the fence and try growing climbing vegetables like peas.

I've started to mulch the plants with straw. Another thing to love about lasagna gardening is that whatever you choose to mulch with simply becomes another layer of the garden! I've chosen straw since it's easily available and provides a cleanish, dry surface for the any produce that might be growing on or near the ground.

Lasagna Garden Beds

Two of my cherry tomato plants got zapped by frost. They looked pretty bad, but I thought they might have just enough greenery intact to survive...

Frostbitten Cherry Tomato Plant

...Check it out! They seem to have recovered nicely:

Recovered cherry tomato plants

Two of the Pink Brandywine also got zapped...

Frost nipped Brandywine

...but are looking much better these days:

Pink Brandywine

I forgot to include one of the tomato plants I planted. This is a watermelon beefsteak. I really know nothing at all about the heirloom tomatoes I planted, but I'm guessing this one might produce some BIG tomatoes.

Watermelon Beefsteak

Remember the slightly sickly Yellow Taxi?

Yellow Taxi Tomato

Looking better:

Yellow Taxi recovered

The cucumbers got lightly zapped too.....

Frost nipped cucumber

...but are making a comeback. The largest one was a just-in-case plant I got to have in case the others didn't make it. If they all produce, we'll be swamped with cucumbers!

Cucumbers

Remember that frost bitten and discarded zucchini plant I plucked off the compost pile?

Salvaged Zucchini Plant

It's doing quite well now:

recovered zucchini

The pepper plants look okay, but not great - a little yellowed. Not sure what to expect since I've only ever planted them once and I think they got trampled by bunnies. I read a suggestion to cover the soil with a black barrier because peppers like it really hot. That was easy enough to do, so I'm giving it a try.

pepper plants

The beans are up and coming along. I left 3 spots with two plants growing together and 3 spots where I thinned them back to just one plant. I figured I'd experiment and see what works best.

Green Beans

The basil is a bit worrisome. It's hard to see in these photos, ,but they look a little yellowed with some brown spots on the leaves. Not quite sure what's going on here, but I suspect it might be too windy for the basil. I don't know of many spaces around our house that are NOT windy, so if wind is the culprit, I'm not quite sure what I'll do. I'll have to scout out a place that's sunny enough up close to the house and maybe try growing it in pots again. We'll just have to see how they do.......

basil plants

I have several volunteer plants coming out of the compost. I'm very curious as to what they might be, so I may not be turning my compost this summer! I think I'll just let them grow and see what happens. It will be really hard to mow, but oh well. Based on what we've thrown into the compost, they are mostly likely pumpkins, butternut squash or cucumbers. Anyone care to take a guess?

Volunteers in the compost

Speaking of the compost, this is the one really untidy-looking area of the garden. We have it so that we can't see it from the deck, but I think our neighbors probably can see the pile of garbage bags, so I'm going to try to come up with a plan to make this area a little neater looking. Not that our neighbors ever sit outside to enjoy the weather or our gorgeous views anyway...but still....it would make me feel better to have it looking nice.

Compost area

Well, I think that's it for now. One thing I have definitely learned is to be patient. It's not over until it's over. I've had several plants virtually spring back from the dead, so I will no longer give up on them until they are lying shriveled in the dirt!

The next project that needs to be done sooner rather than later is to figure out how to rig up some sort of soaker hose or drip irrigation so that I can properly water the garden. I can tell you one thing - I get quite a workout dragging the blasted hose all the way down to the garden and back up again! If we had some extra cash lying around, I'd get someone to come out and install a faucet way down yonder. Maybe some day......